Data Acquisition Hardware#
The Miniscope-DAQ is the most common hardware for acquiring data from miniscopes derived from the UCLA Miniscope v4 and the v4 itself.
Note
Wireless miniscopes with on-board loggers such as the UCLA Miniscope v3 Wireless do not require data-acqusition hardware.
Miniscope-DAQ#
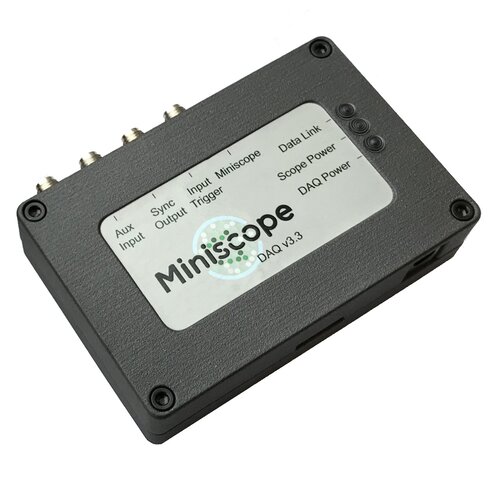
The Miniscope-DAQ is the data acquisition hardware developed by the UCLA Miniscope team for acquiring miniscope data. It accepts an external power supply for more power-intensive applications and plugs into a PC through a USB cable. It supports sync output, input trigger, and data acquisition from a UCLA Miniscope v4, MiniCAM, and other miniscopes derived from the UCLA Miniscope v4. The Miniscope-DAQ is supported by Bonsai and Miniscope-DAQ-QT-Software. To acquire miniscope or MiniCAM data with the Miniscope-DAQ, refer to the corresponding Quick Start Guide and User Guide. To learn more about the Miniscope-DAQ, refer to the UCLA Miniscope v4 Wiki.
Miniscope-DAQ Functionality#
I/O#
Miniscope-DAQs from Open Ephys have the following I/O:
Input trigger: a digital input to initiate and terminate data acquisition
A rising edge initiates data acquisition
A falling edge terminates data acquisition
Sync output: a digital output in which every rising or falling edge indicates a new frame
The I/O operate at a 3.3V logic level. The input is 5V tolerant.
The aux input is not currently supported in software.
External Power#
The Miniscope-DAQ can accept an external power source and forward it to a connected device for particularly power-intensive applications in which USB3.0 cannot provide sufficient power or voltage. Using an external power source is required for the MiniCAM and recommended for the UCLA Miniscope v4. For more information on symptoms related to insufficient power, refer to the Troubleshooting (coming soon) guide. To use an external power source instead of USB3.0:
Unscrew all four fasteners that fasten the Miniscope-DAQ’s enclosure. It might be necessary to apply gentle pressure on the nuts on the bottom of the DAQ to prevent them from turning when unscrewing the screws.
Set the jumper according to which power source you would like to use following to the silk screen:
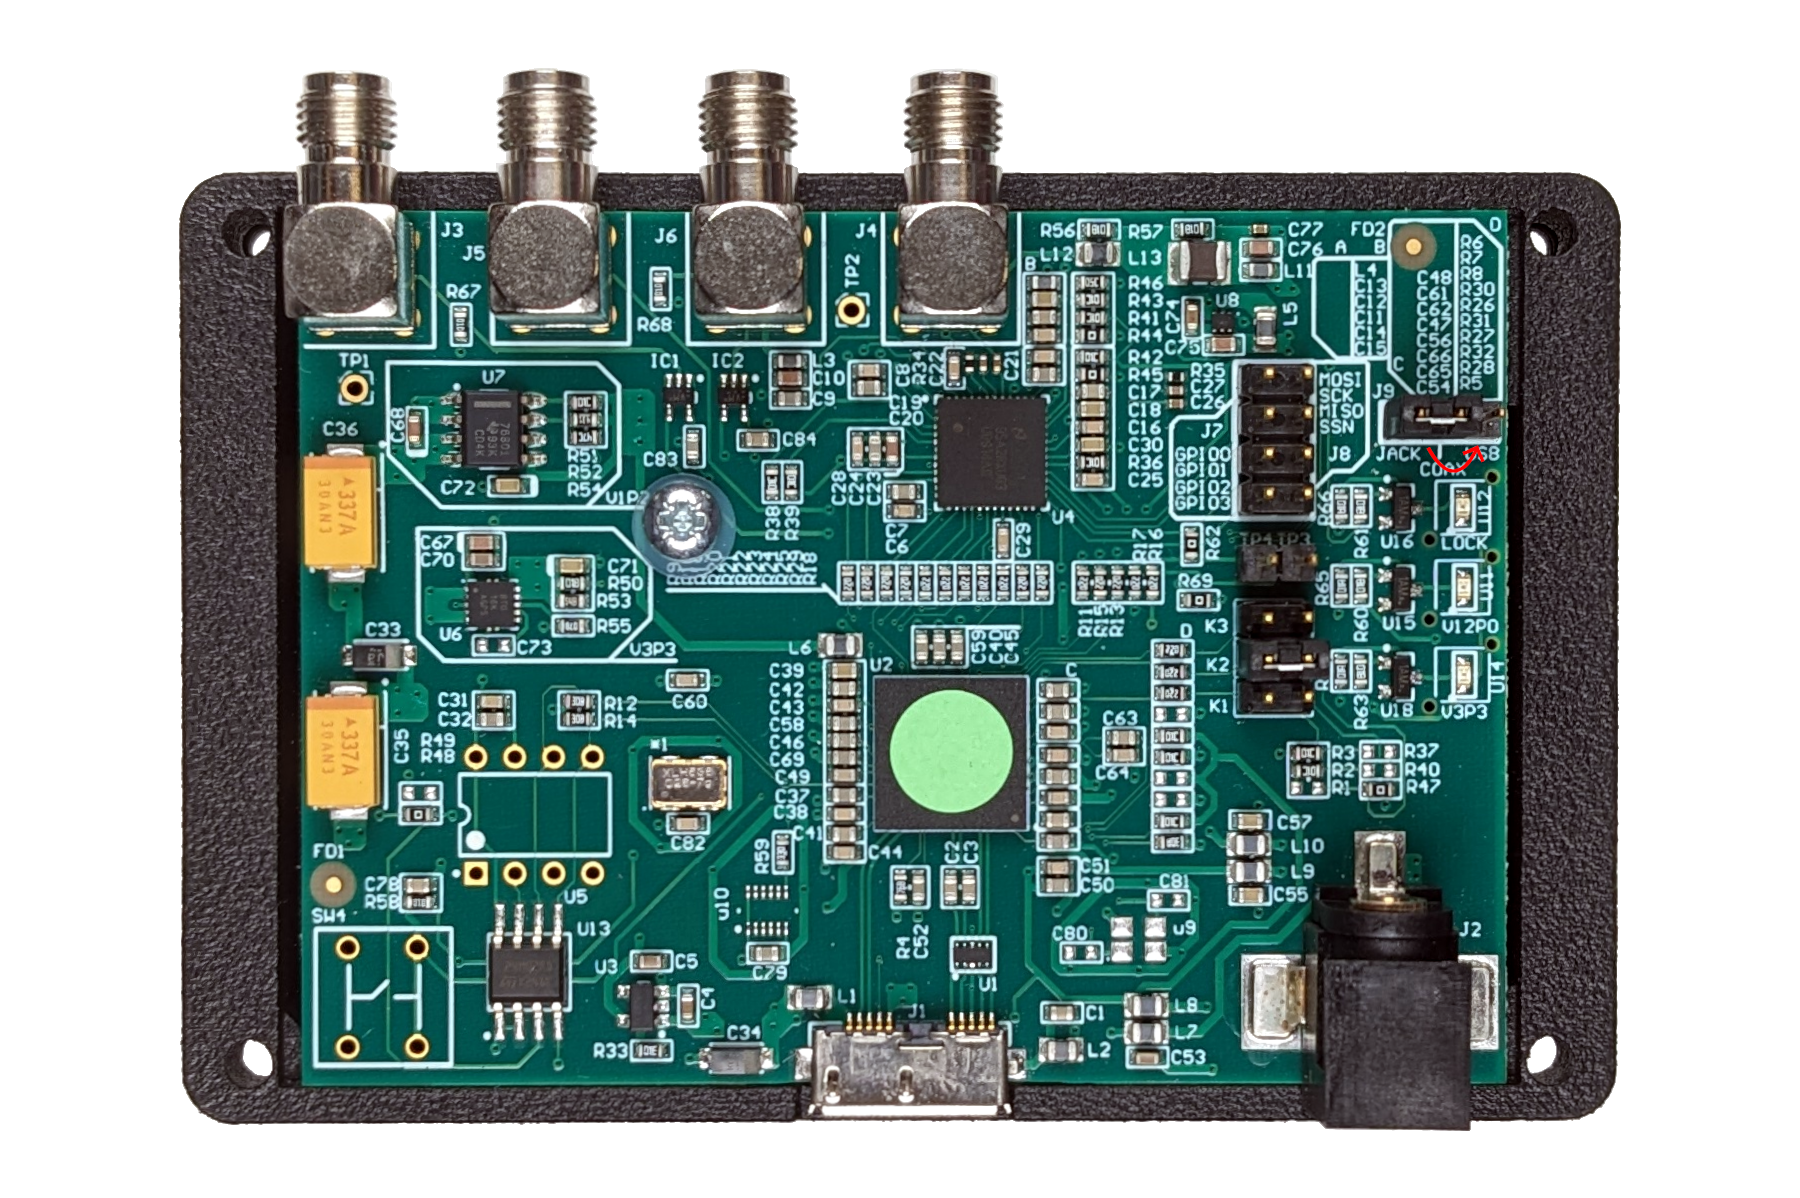
Replace the four fasteners.
Note
If the Miniscope-DAQ is set to use external power, the barrel jack must be plugged in to use the connected miniscope/minicam.
Recommended specifications for an external power supply are as follows:
5-6V
To dial in the ideal power supply voltage for your setup (in particular for your tether), use an adjustable power supply (e.g. ) and probe the following pads while adjusting the voltage. The ideal voltage at those pads is about 4V. This voltage is high enough to maximize reliability of the UCLA Miniscope v4 acquisition and low enough to minimize unnecesary heat generation.
2A, though this value is depedent on your miniscope/camera device. The MiniCAM with an attached IR LED ring requires more current than the UCLA Miniscope v4, for instance.
Center-positive polarity
By default, the Miniscope-DAQ is set to use USB power.
LED Indicators#
Miniscope-DAQs have the following green LED indicators:
DAQ Power: This LED indicates the Miniscope-DAQ is receiving power. Establishing the USB connection between the Miniscope-DAQ and your PC toggles this LED on.
Scope Power: This LED indicates the Miniscope-DAQ is forwarding power to the device that is connected to the Miniscope port.
If the power jumper is set to , the LED turns on after establishing the USB connection
If the power jumper is set to , the LED turns on after establishing the USB connection and the external power source connection
Data Link: This LED indicates the Miniscope-DAQ communication is established between the Miniscope-DAQ and the connected device.
Note
If the Miniscope-DAQ is set to use external power, the barrel jack must be plugged in for the Scope Power LED to toggle on.
Syncing Data#
For strict data syncing requirements, best practice involves using a combination of the UCLA Miniscope v4’s sync output and software timestamps.
Software timestamps are accurate to within a few milliseconds which is insufficient for stricter data syncing requirements. Though the sync output is accurate to within microseconds, it alone is also insufficient because it is possible for frames to drop on the way from the Miniscope-DAQ to the PC. Therefore, it is to corroborate sync output data with software timestamps to ensure that a sync output frame corresponds a frame received by the PC.
The effect of a dropped frame is a larger inter-frame interval. If you are struggling with dropped frames, try changing USB ports, USB drivers, and removing other devices that are sharing the USB bus. Dropped frames are due to limited USB bandwidth and timing constraints. On a proper setup, expect a dropped frame every few thousand frames.
The input trigger involves 10-100ms latency so relying on it for syncing data is also not recommended.
Miniscope-DAQ Variants#
MiniDAQ#
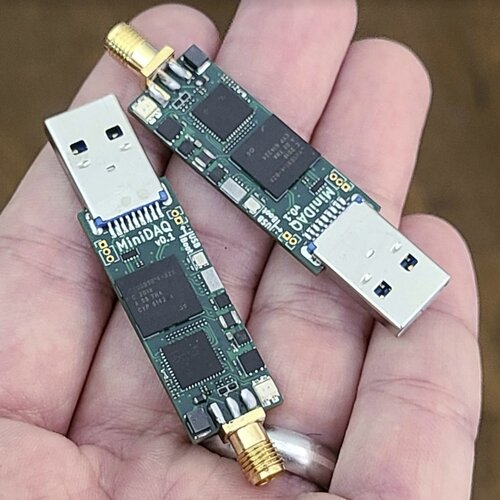
The MiniDAQ is a simplified, more compact, and more affordable version of the Miniscope-DAQ. It plugs directly into a PC through its on-board USB cable. It supports data acquisition from a single UCLA Miniscope v4 with a short tether. Unlike the Miniscope-DAQ, the MiniDAQ does not accept an external supply or support sync output or input trigger functions. The MiniDAQ is compatible with Bonsai and Miniscope-DAQ-QT-Software. To acquire miniscope, follow the same user guides as the Miniscope-DAQ.
NINscope-DAQ#
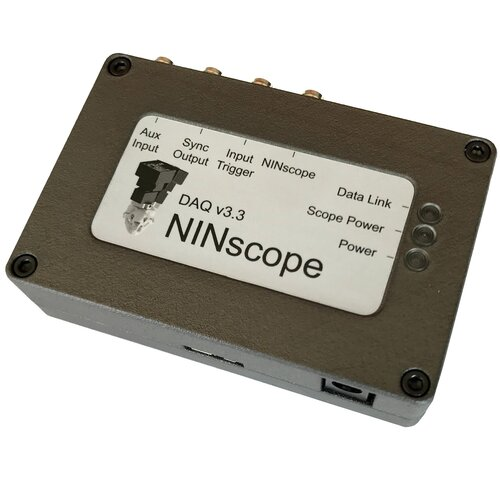
The NINscope-DAQ is like the Miniscope-DAQ except the NINscope-DAQ is also compatible with the NINscope. It accepts an external power supply for more power-intensive applications and plugs into a PC through a USB cable. It supports sync output, input trigger, and data acquisition from a single NINscope. The NINscope is compatible with custom NINscope software from the NINscope developers. To learn more about the NINscope, refer to the NINscope hardware wiki from the NINscope developers.