Firmware Manual#
Use this guide to upload firmware to your Miniscope DAQ. This should only be necessary in specific situations:
When a new firmware version is released, as a routine update. This should not happen often as we do not expect to release new firmware versions frequently, but it is recommended to check for updates every once in a while to make sure you are using the latest version.
When troubleshooting, if the flash memory (EEPROM) on the DAQ has corrupted and the system no longer recognizes the device as “MINISCOPE” or “UCLA/Open Ephys Miniscope DAQ v3”. In this case, uploading firmware to the device can fix the issue and restore normal operation.
Understanding the device’s boot modes helps clarify the firmware upload procedure. The Miniscope DAQ has two boot modes:
Boot from EEPROM, the flash memory that holds the firmware for normal operation
Boot from USB controller, which can be used to load the bootloader onto the DAQ’s microcontroller which can in-turn upload new firmware to the EEPROM
To upload firmware to the EEPROM, you typically have to force the device to enter bootloader mode by physically moving jumpers on the PCB inside the DAQ. However, if the device malfunctioned and the flash memory is corrupted, the device will try to boot from USB regardless of the jumper position. In this case, the firmware upload procedure can be carried out without opening the device.
When using bootloader mode, the Miniscope DAQ Bootloader drivers (Cypress USB) must be installed for Windows to recognize the device. These drivers are not required during normal operation and so are not installed by default. They must be installed separately on each PC used for firmware updates.
The state of the Miniscope DAQ can be determined by checking the Device Manager, and corresponding courses of action are summarized in the following diagram:
        flowchart
            A("Firmware upload required")
            A -->C
            C{"How is the Miniscope DAQ listed in the Windows Device Manager?"}
            C -->|"MINISCOPE"| D["`Configure the Hardware
            for Bootloader Mode`"]
            D --> C
            C -->|"Westbridge"| E["Install the Miniscope DAQ Bootloader Driver"]
            C -->|"Cypress FX3 USB BootLoader Device"| F["Firmware Upload using Cypress Control Center"]
            E --> C
            F --> H["_If required_, re-configure the hardware for normal use"]
            H --> I["Power cycle"]
            I --> J("Firmware updated. Device ready to use listed as MINISCOPE in Windows Device Manager")
Click on the icon at the top-right corner of the flow chart to zoom-in#
The instructions to perform all operations are detailed below, including physically configuring the hardware and installing the bootloader driver even though they might not always be necessary.
Required components: Miniscope DAQ, USB3.0 cable (Micro Type B ↔ Type A)
Tools that might be required: 2.5 mm hex key for opening the screws on the Miniscope DAQ’s enclosure
Check the Windows Device Manager#
Connect the Miniscope DAQ to the PC using a USB3.0 connection and check the Windows Device Manager.
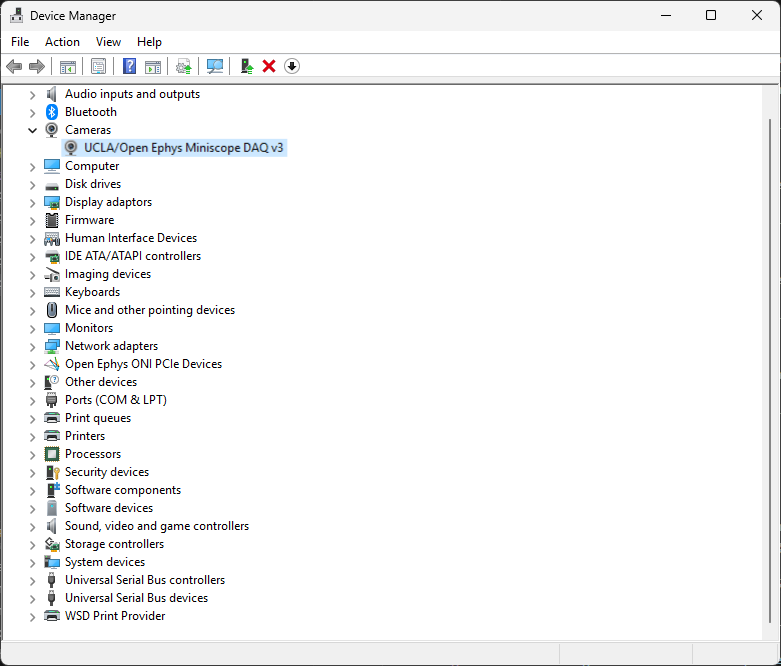
If the Miniscope DAQ is working normally, it should be listed as UCLA/Open Ephys Miniscope DAQ v3, under Cameras.
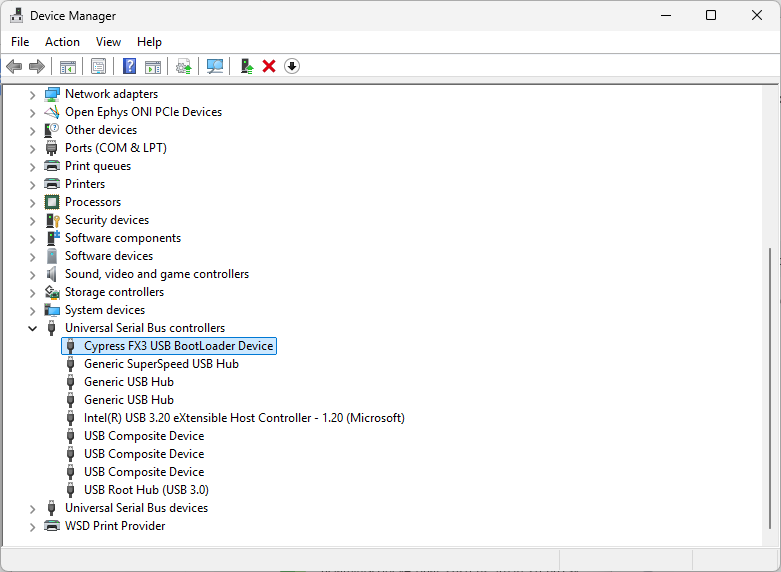
If the Miniscope DAQ was having issues, it might already be in bootloader mode and can either be listed as Cypress FX3 USB BootLoader Device under Universal Serial Bus controllers (if the bootloader is installed):
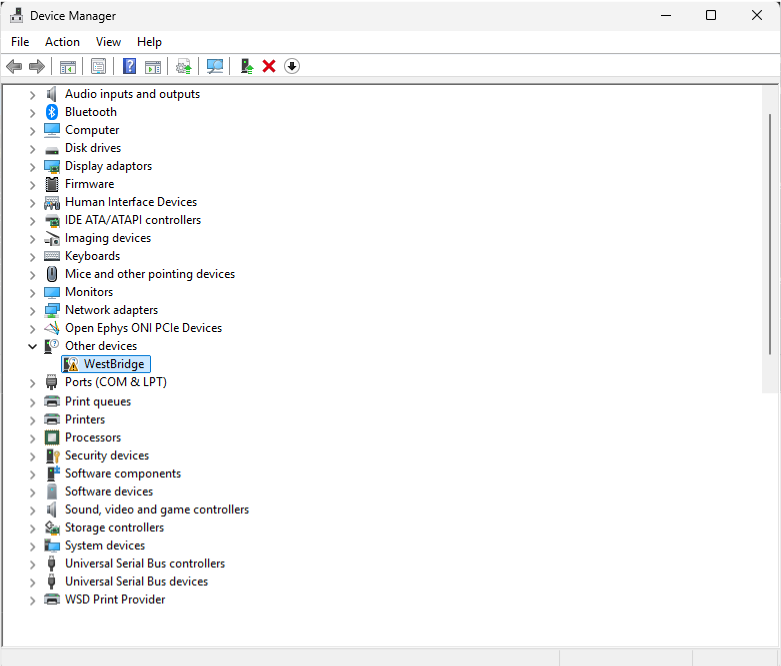
or as WestBridge under Other devices, with a warning icon (if the bootloader driver is not installed):
If the Miniscope DAQ is not listed in the Device Manager, check the USB connection.
Disconnect the Miniscope DAQ from the PC.
Configure the Hardware for Bootloader Mode#
To proceed with the firmware update, the Miniscope DAQ must be in bootloader mode. If not already in that mode, configure the hardware to force the DAQ to load from the bootloader as follows:
With the device disconnected from the PC, open the Miniscope DAQ’s enclosure by using the 2.5 mm hex key to unscrew all four fasteners. It might be necessary to apply gentle pressure on the nuts on the bottom of the DAQ to prevent them from turning when unscrewing the screws.
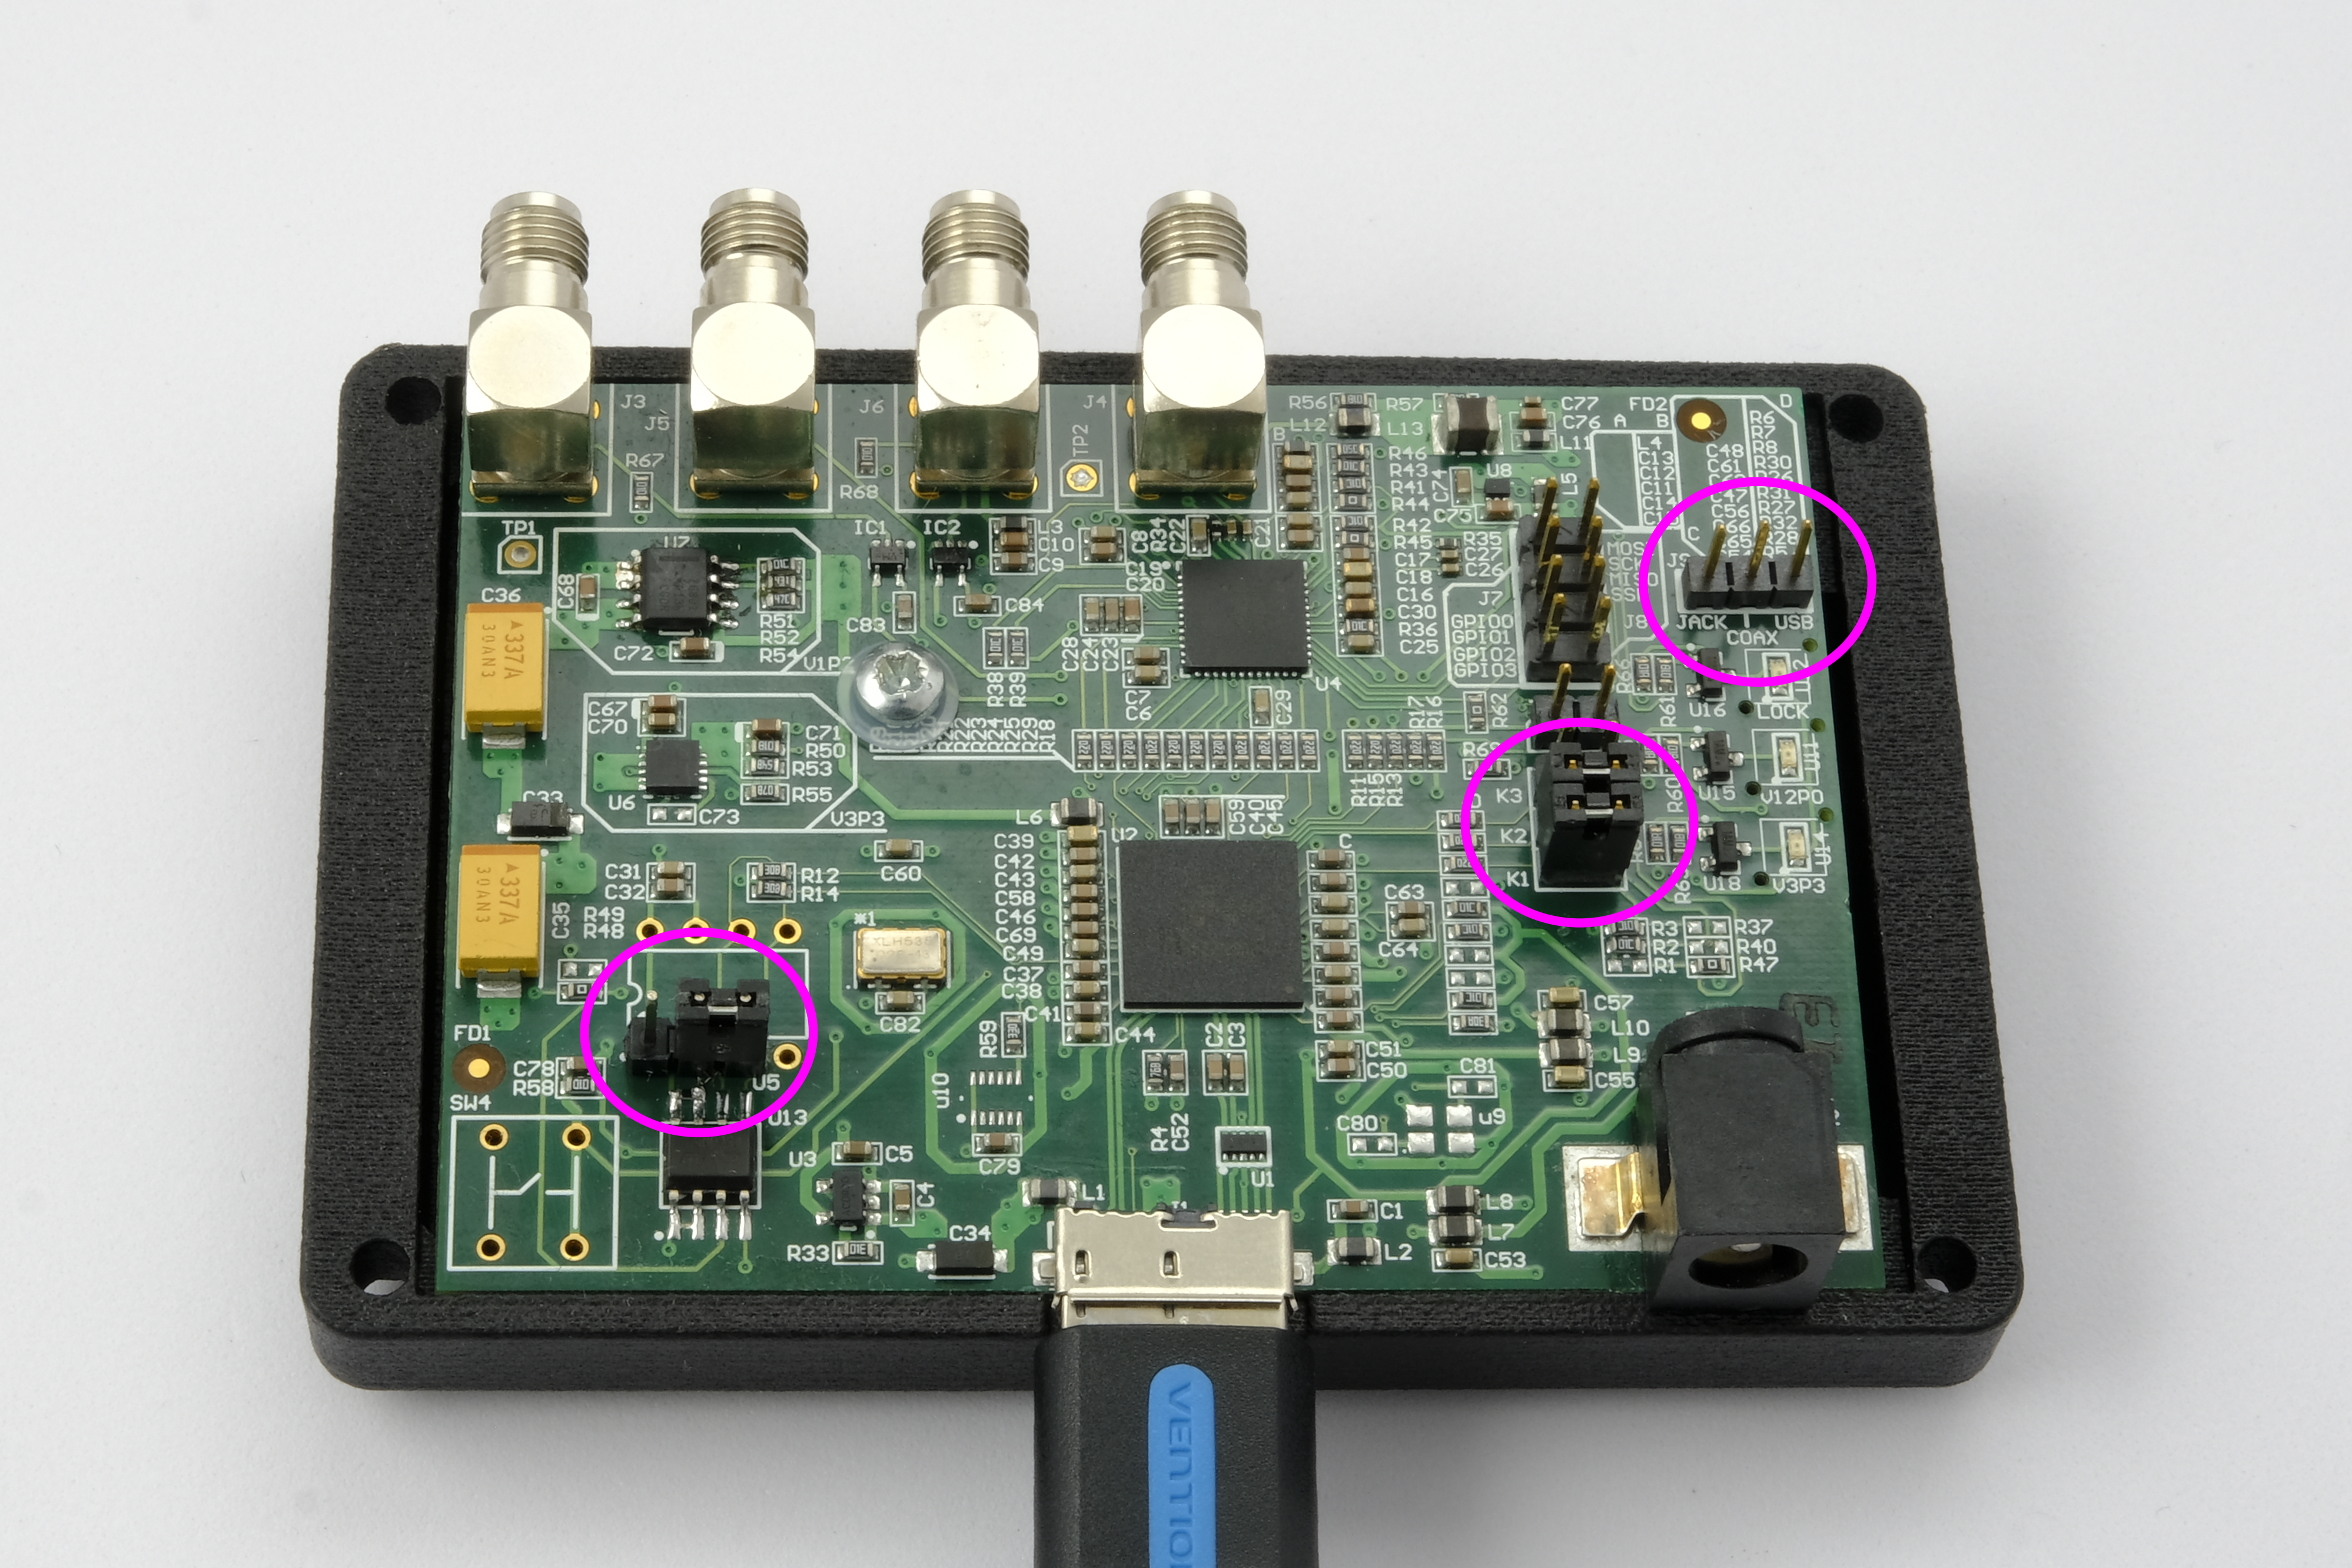
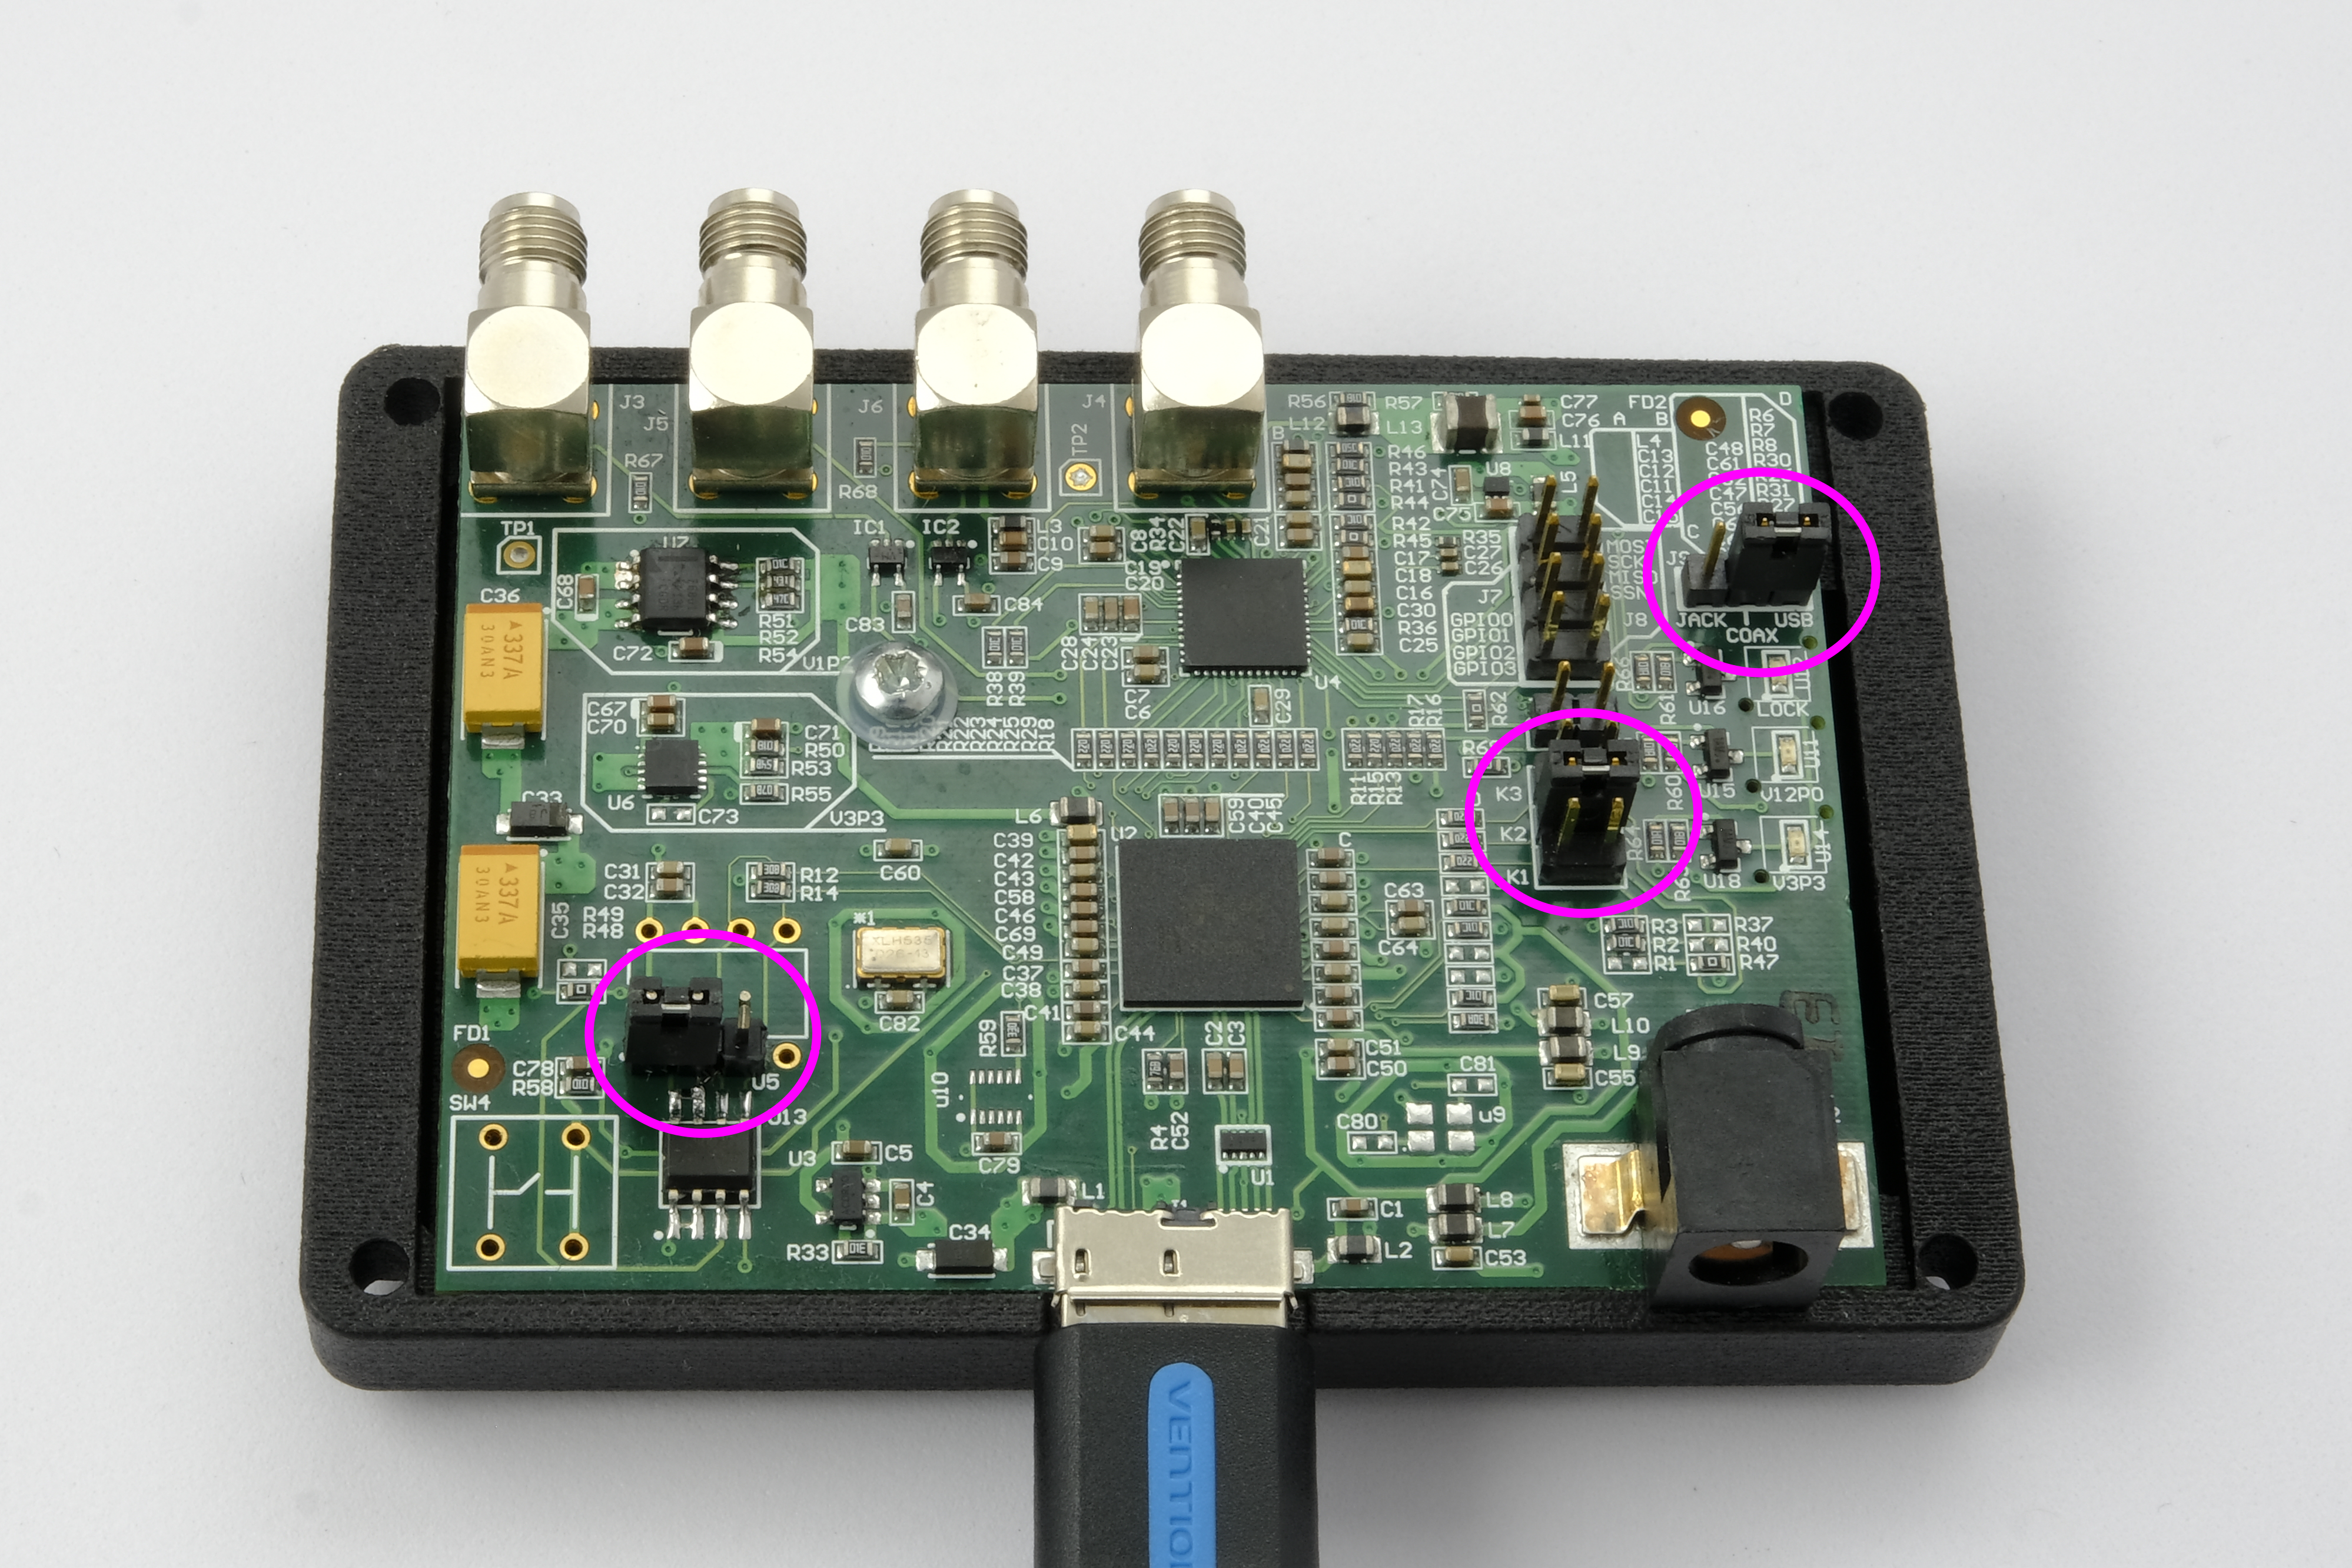
With the PCB exposed, move the jumper on header J9 to close the header labeled K1 as shown in the picture below. The J9 header remains empty. This changes the board to “Boot from USB controller” mode. If you are using a v3.4 DAQ, you additionally need to move the jumper on the bottom left of the PCB to the right-most position to disable the EEPROM write protect.
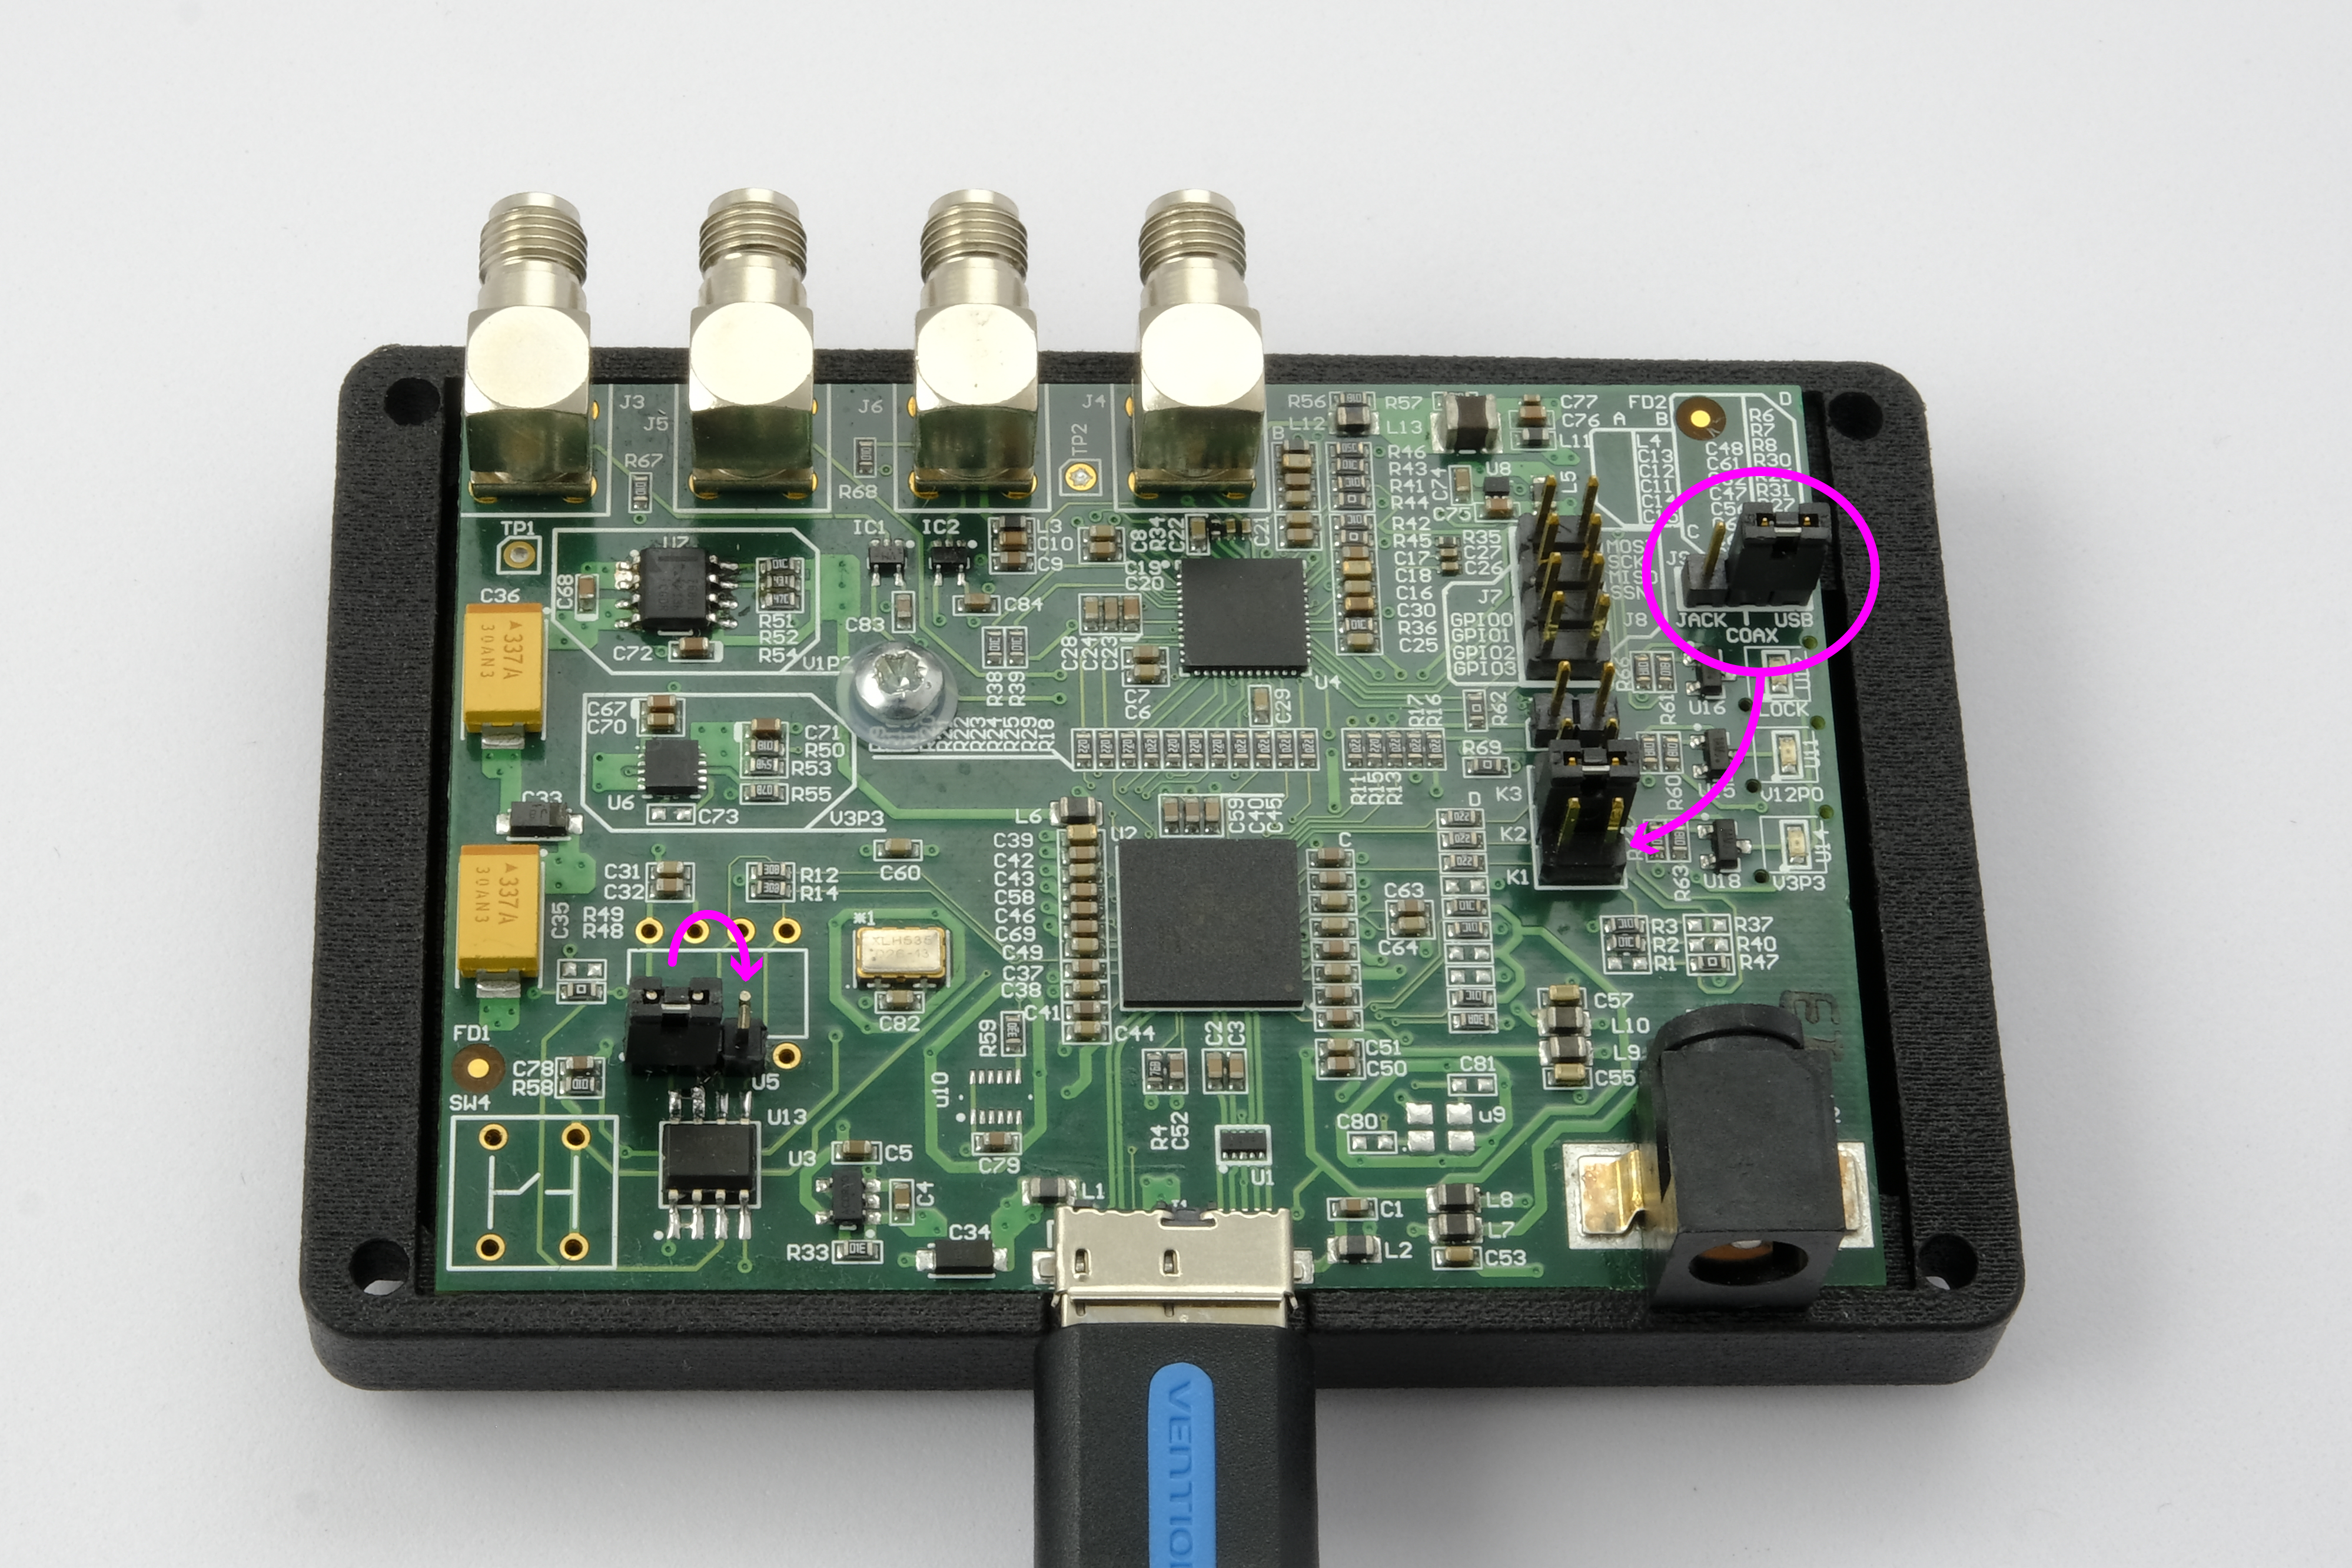
Check that the jumpers are in the correct position as shown in the picture below.
Connect the DAQ to the PC using a USB3.0 connection. Only the DAQ Power indicator LED will be on. It should be listed in the Device Manager as Cypress FX3 USB BootLoader Device under Universal Serial Bus controllers:
Install the Miniscope DAQ Bootloader Driver#
To proceed with the firmware update, the Miniscope DAQ should be listed as Cypress FX3 USB BootLoader Device under Universal Serial Bus controllers. If, instead, it is listed as WestBridge under Other devices, the bootloader driver needs to be installed:
Download the Infineon (Cypress) drivers:
Resource
Version
Release Date
1.3.0.3
2022.03.06
Unzip the downloaded file and open the unzipped folder.
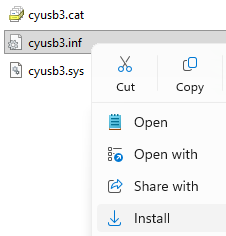
Right-click the .inf file and select Install.
Follow the instructions to install the driver. You should see a success message once the process is finished.
Firmware Upload#
Download the firmware uploader application:
Resource
Version
Release Date
1.1.4
2026.04.20
Unzip the downloaded file and open the unzipped folder.
Double-click on the executable to run the application. Allow the application to run.
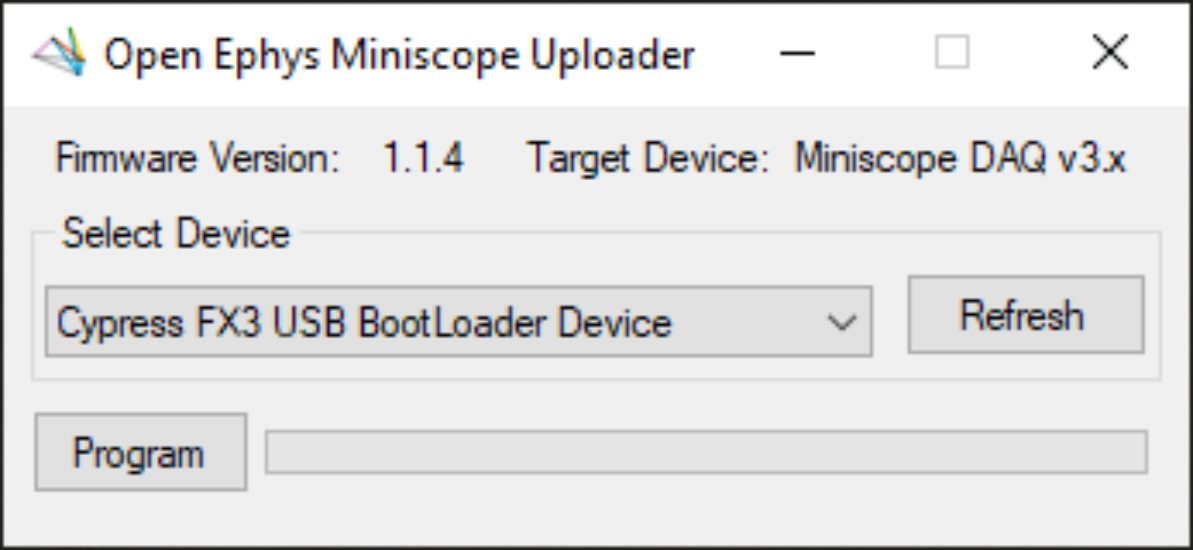
Make sure the Cypress FX3 USB BootLoader Device is listed in the drop-down menu and click Program. If the device is not listed, check the hardware connections, that it is configured for bootloader mode and that the bootloader driver is installed as explained previously.
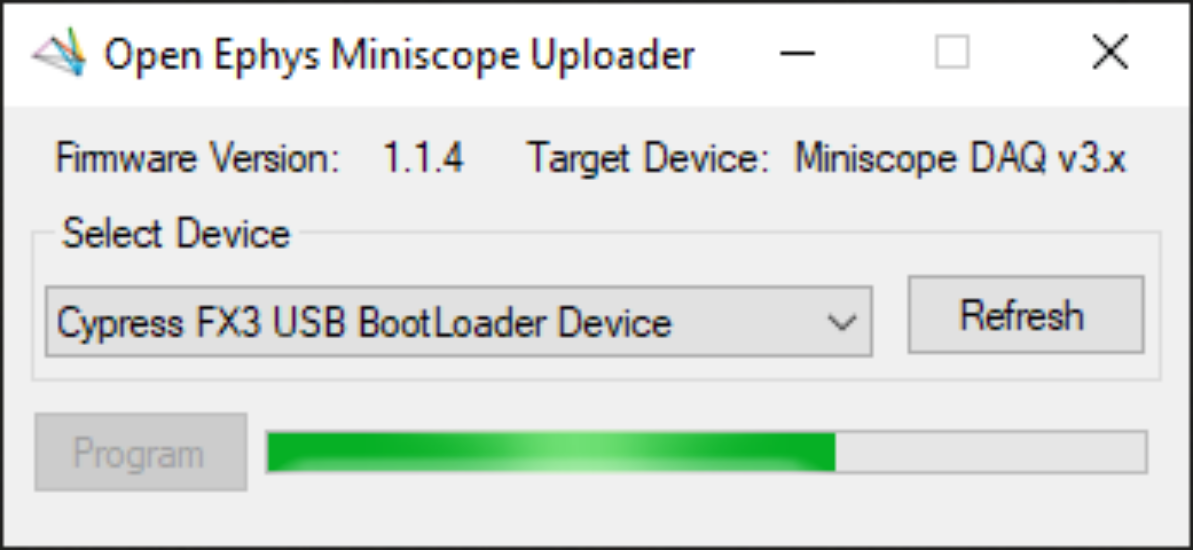
Wait for the uploader to finish programming.
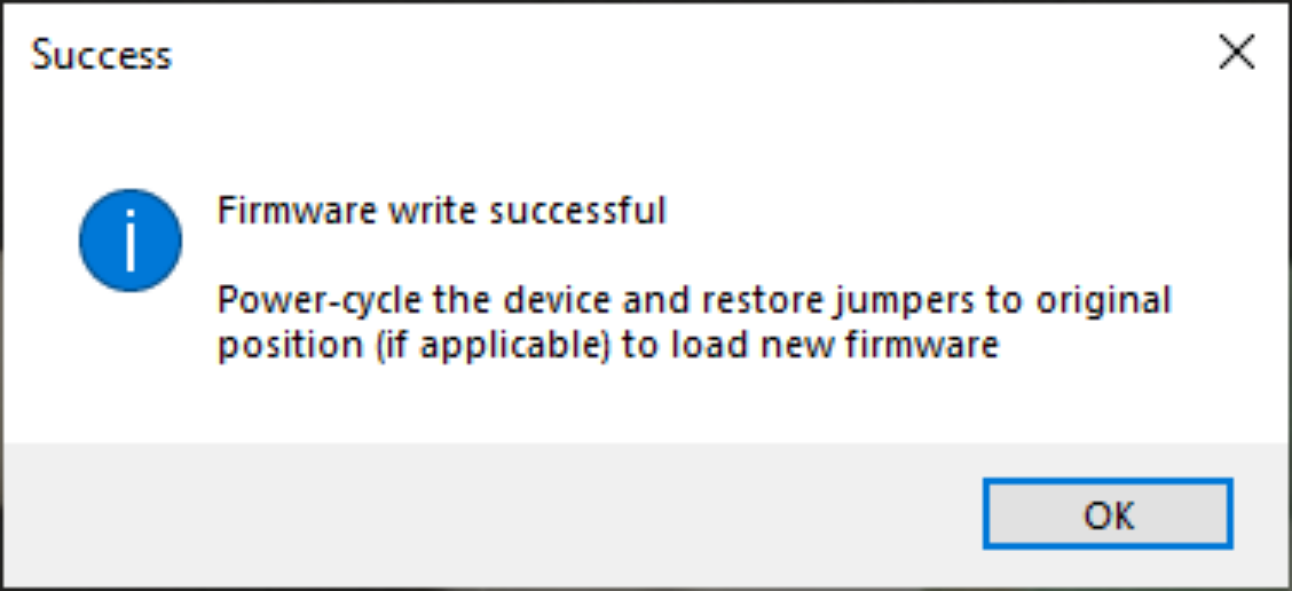
If the programming is successful, you should see a success message:
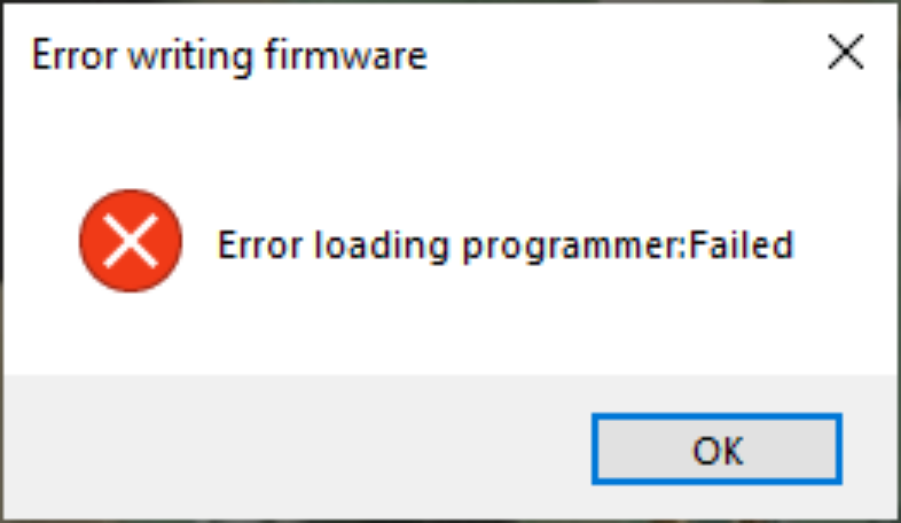
if, instead, you see an error, check the hardware connections and, for v3.4 DAQs, check that the write protect jumper is in the right-most position.
Disconnect the Miniscope DAQ from the PC.
Configure the Hardware for Normal Use#
With the device disconnected from the PC and the PCB still exposed, move the jumper on header K1 back to its original position on the J9 header (likely USB and not Jack as most users use USB power rather than external power). The K1 header remains empty. This changes the board to “Boot from EEPROM” mode. If you are using a v3.4 DAQ, you additionally need to move the jumper on the bottom left of the PCB to the left-most position to enable the EEPROM write protect.
Re-connect the Miniscope DAQ to USB to boot the device. Both the DAQ Power and the Scope Power indicator LEDs will be on.
Check the Device Manager. The Miniscope DAQ should be listed as UCLA/Open Ephys Miniscope DAQ v3, under Cameras.
Replace the four fasteners to close the Miniscope DAQ. The device is ready for normal operation.