Firmware Update#
Follow these steps to update the firmware on your Miniscope DAQ.
Important
These instructions assume the device is currently working normally (e.g.
listed as MINISCOPE in Windows Device Manager). If this is not the case
or you would like more in-depth instructions, please refer to the
firmware manual.
Required Materials
Miniscope DAQ
USB3.0 cable (Micro Type B ↔ Type A)
2.5 mm hex key
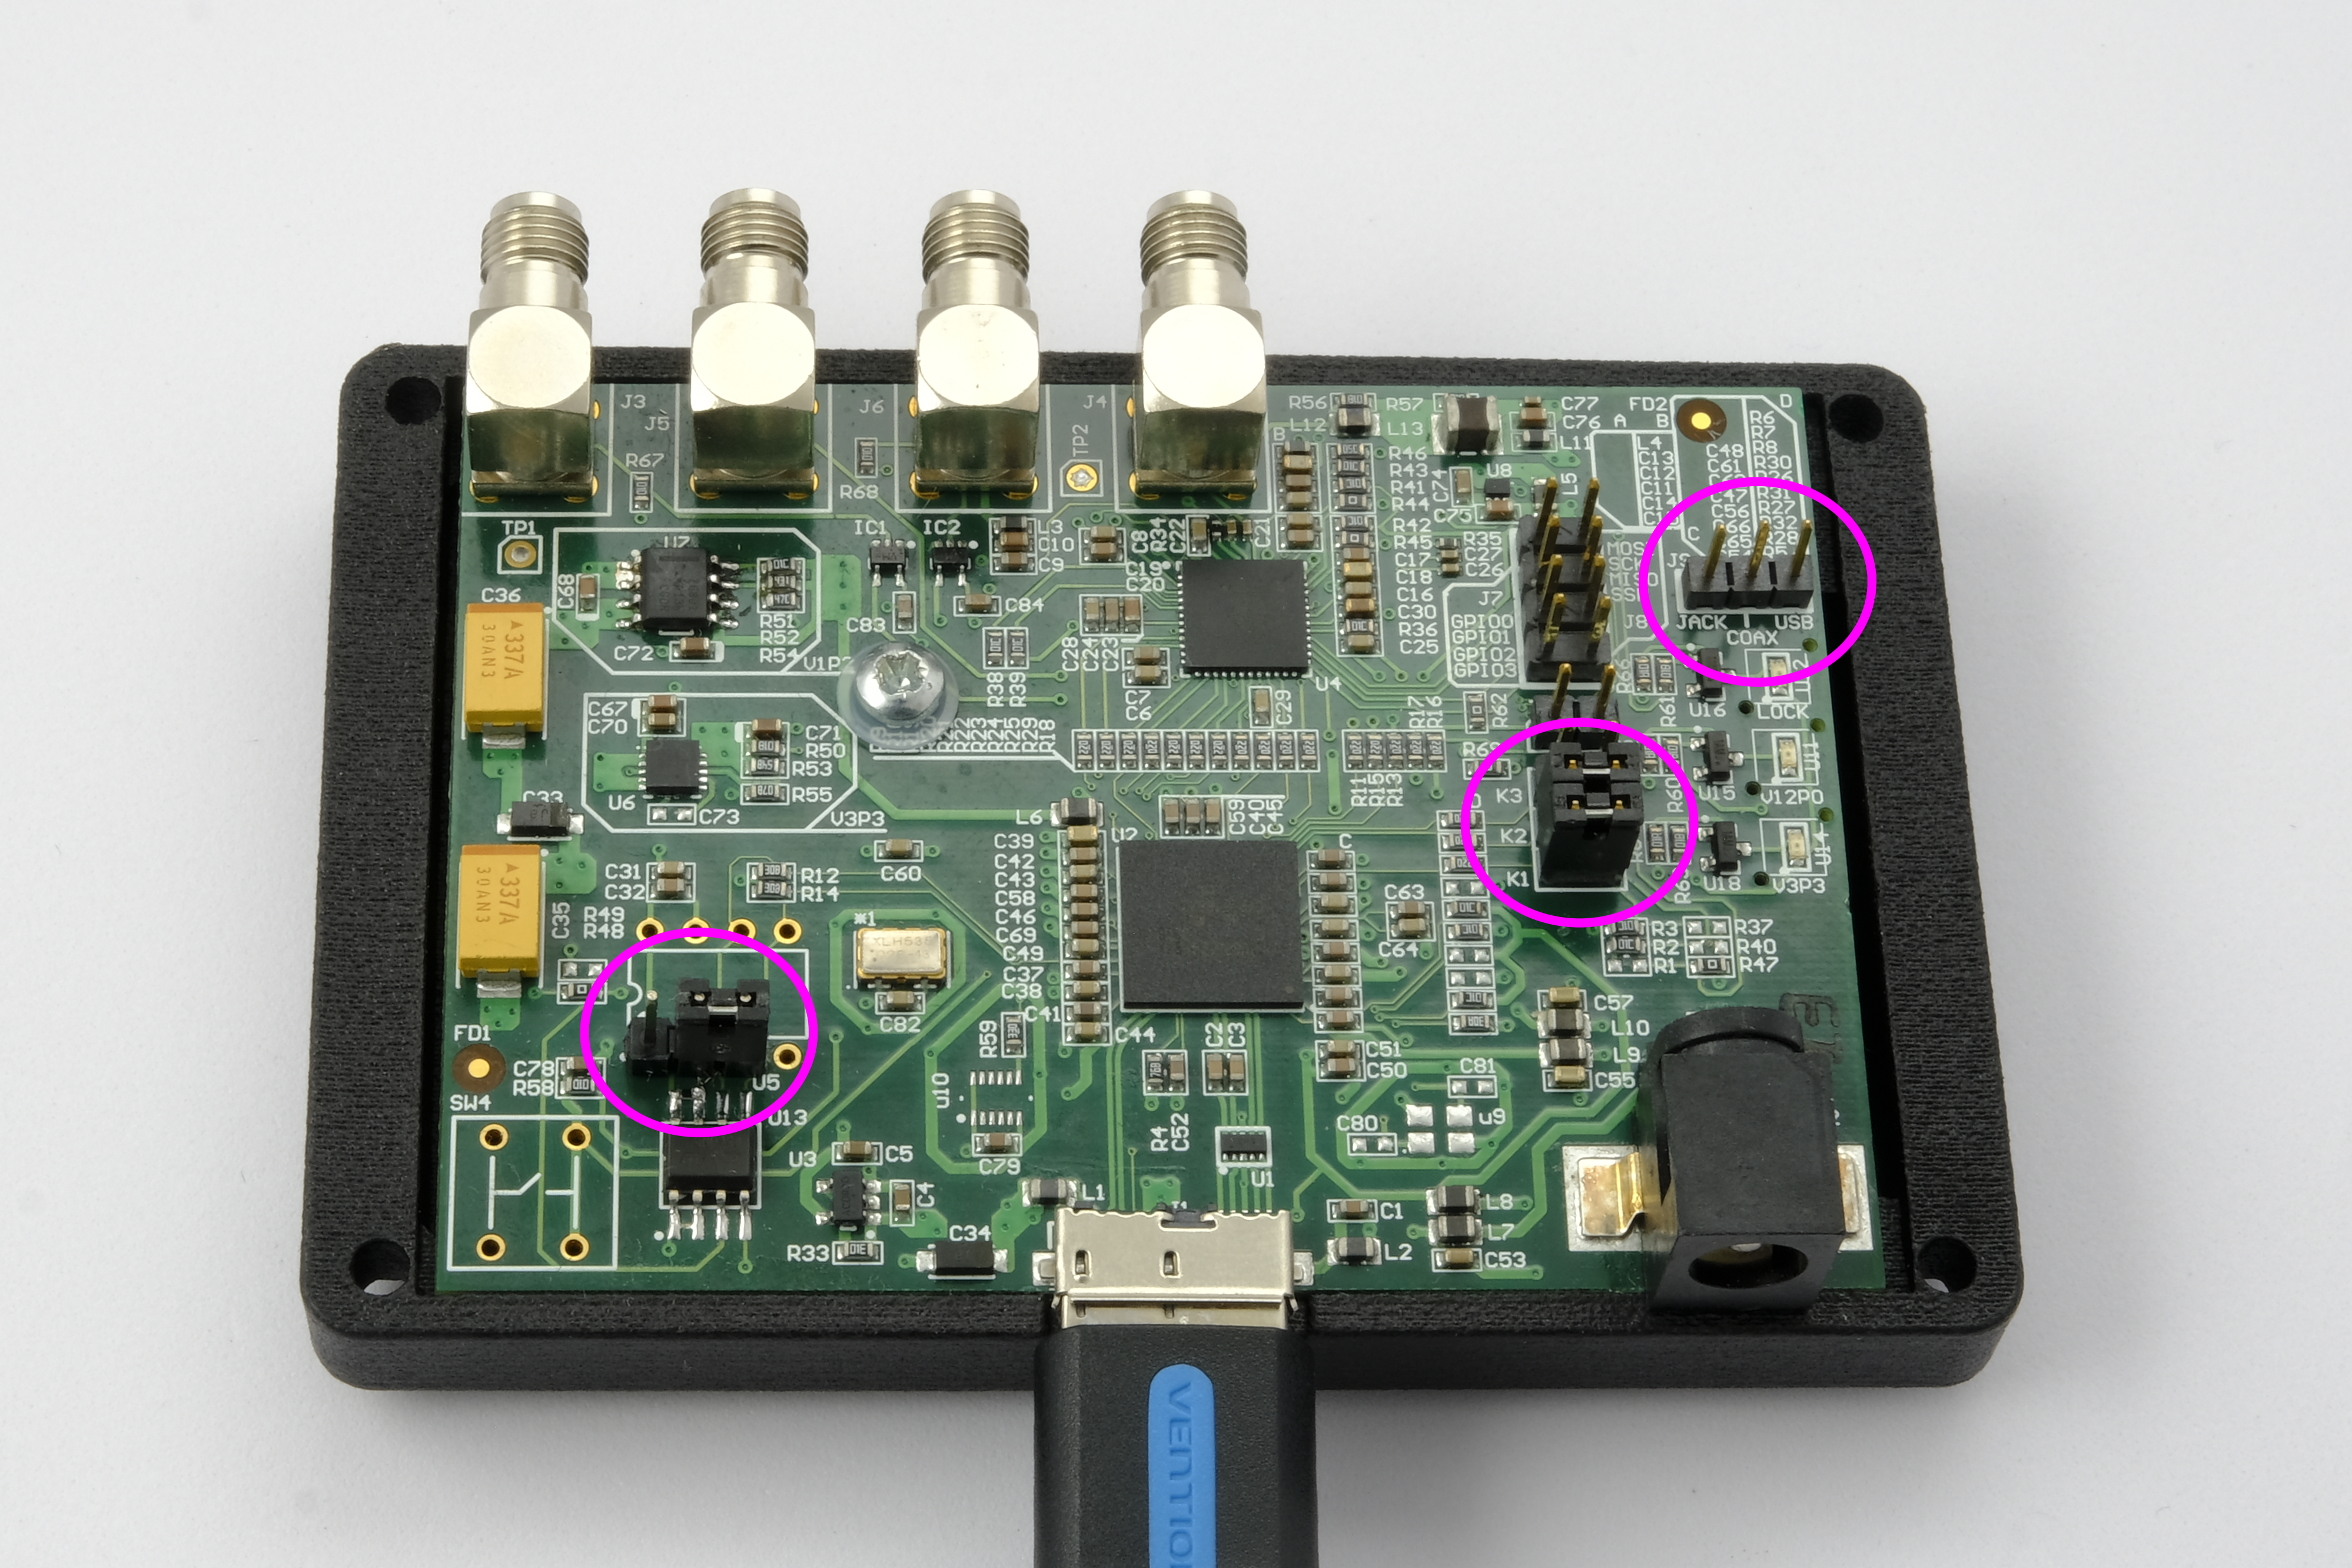
Step 1: Configure the Hardware for Bootloader Mode#
Disconnect the Miniscope DAQ from the PC.
Open the enclosure using the 2.5 mm hex key to unscrew the four fasteners.
Move the jumper on header J9 to close header K1. The J9 header remains empty.
(v3.4 DAQ only: also move the jumper on the bottom left of the PCB to the right-most position to disable EEPROM write protect.)
Reconnect the DAQ to the PC. It should appear in Windows Device Manager as
Cypress FX3 USB BootLoader DeviceunderUniversal Serial Bus controllers.Note
If it appears as
WestBridgeinstead, you must install the bootloader driver before continuing. See the Firmware Manual for instructions.
Step 2: Upload the Firmware#
Download and unzip the firmware uploader:
Resource
Version
Release Date
1.1.4
2026.04.20
Run the executable and allow it when prompted.
Confirm
Cypress FX3 USB BootLoader Deviceis selected in the drop-down, then click Program.Wait for programming to complete. A success message will appear when done.
Disconnect the DAQ from the PC.
Step 3: Restore Normal Operation#
Move the jumper on header K1 back to its original position on the J9 header. The K1 header remains empty.
(v3.4 DAQ only: also move the jumper on the bottom left of the PCB back to the left-most position to re-enable EEPROM write protect.)
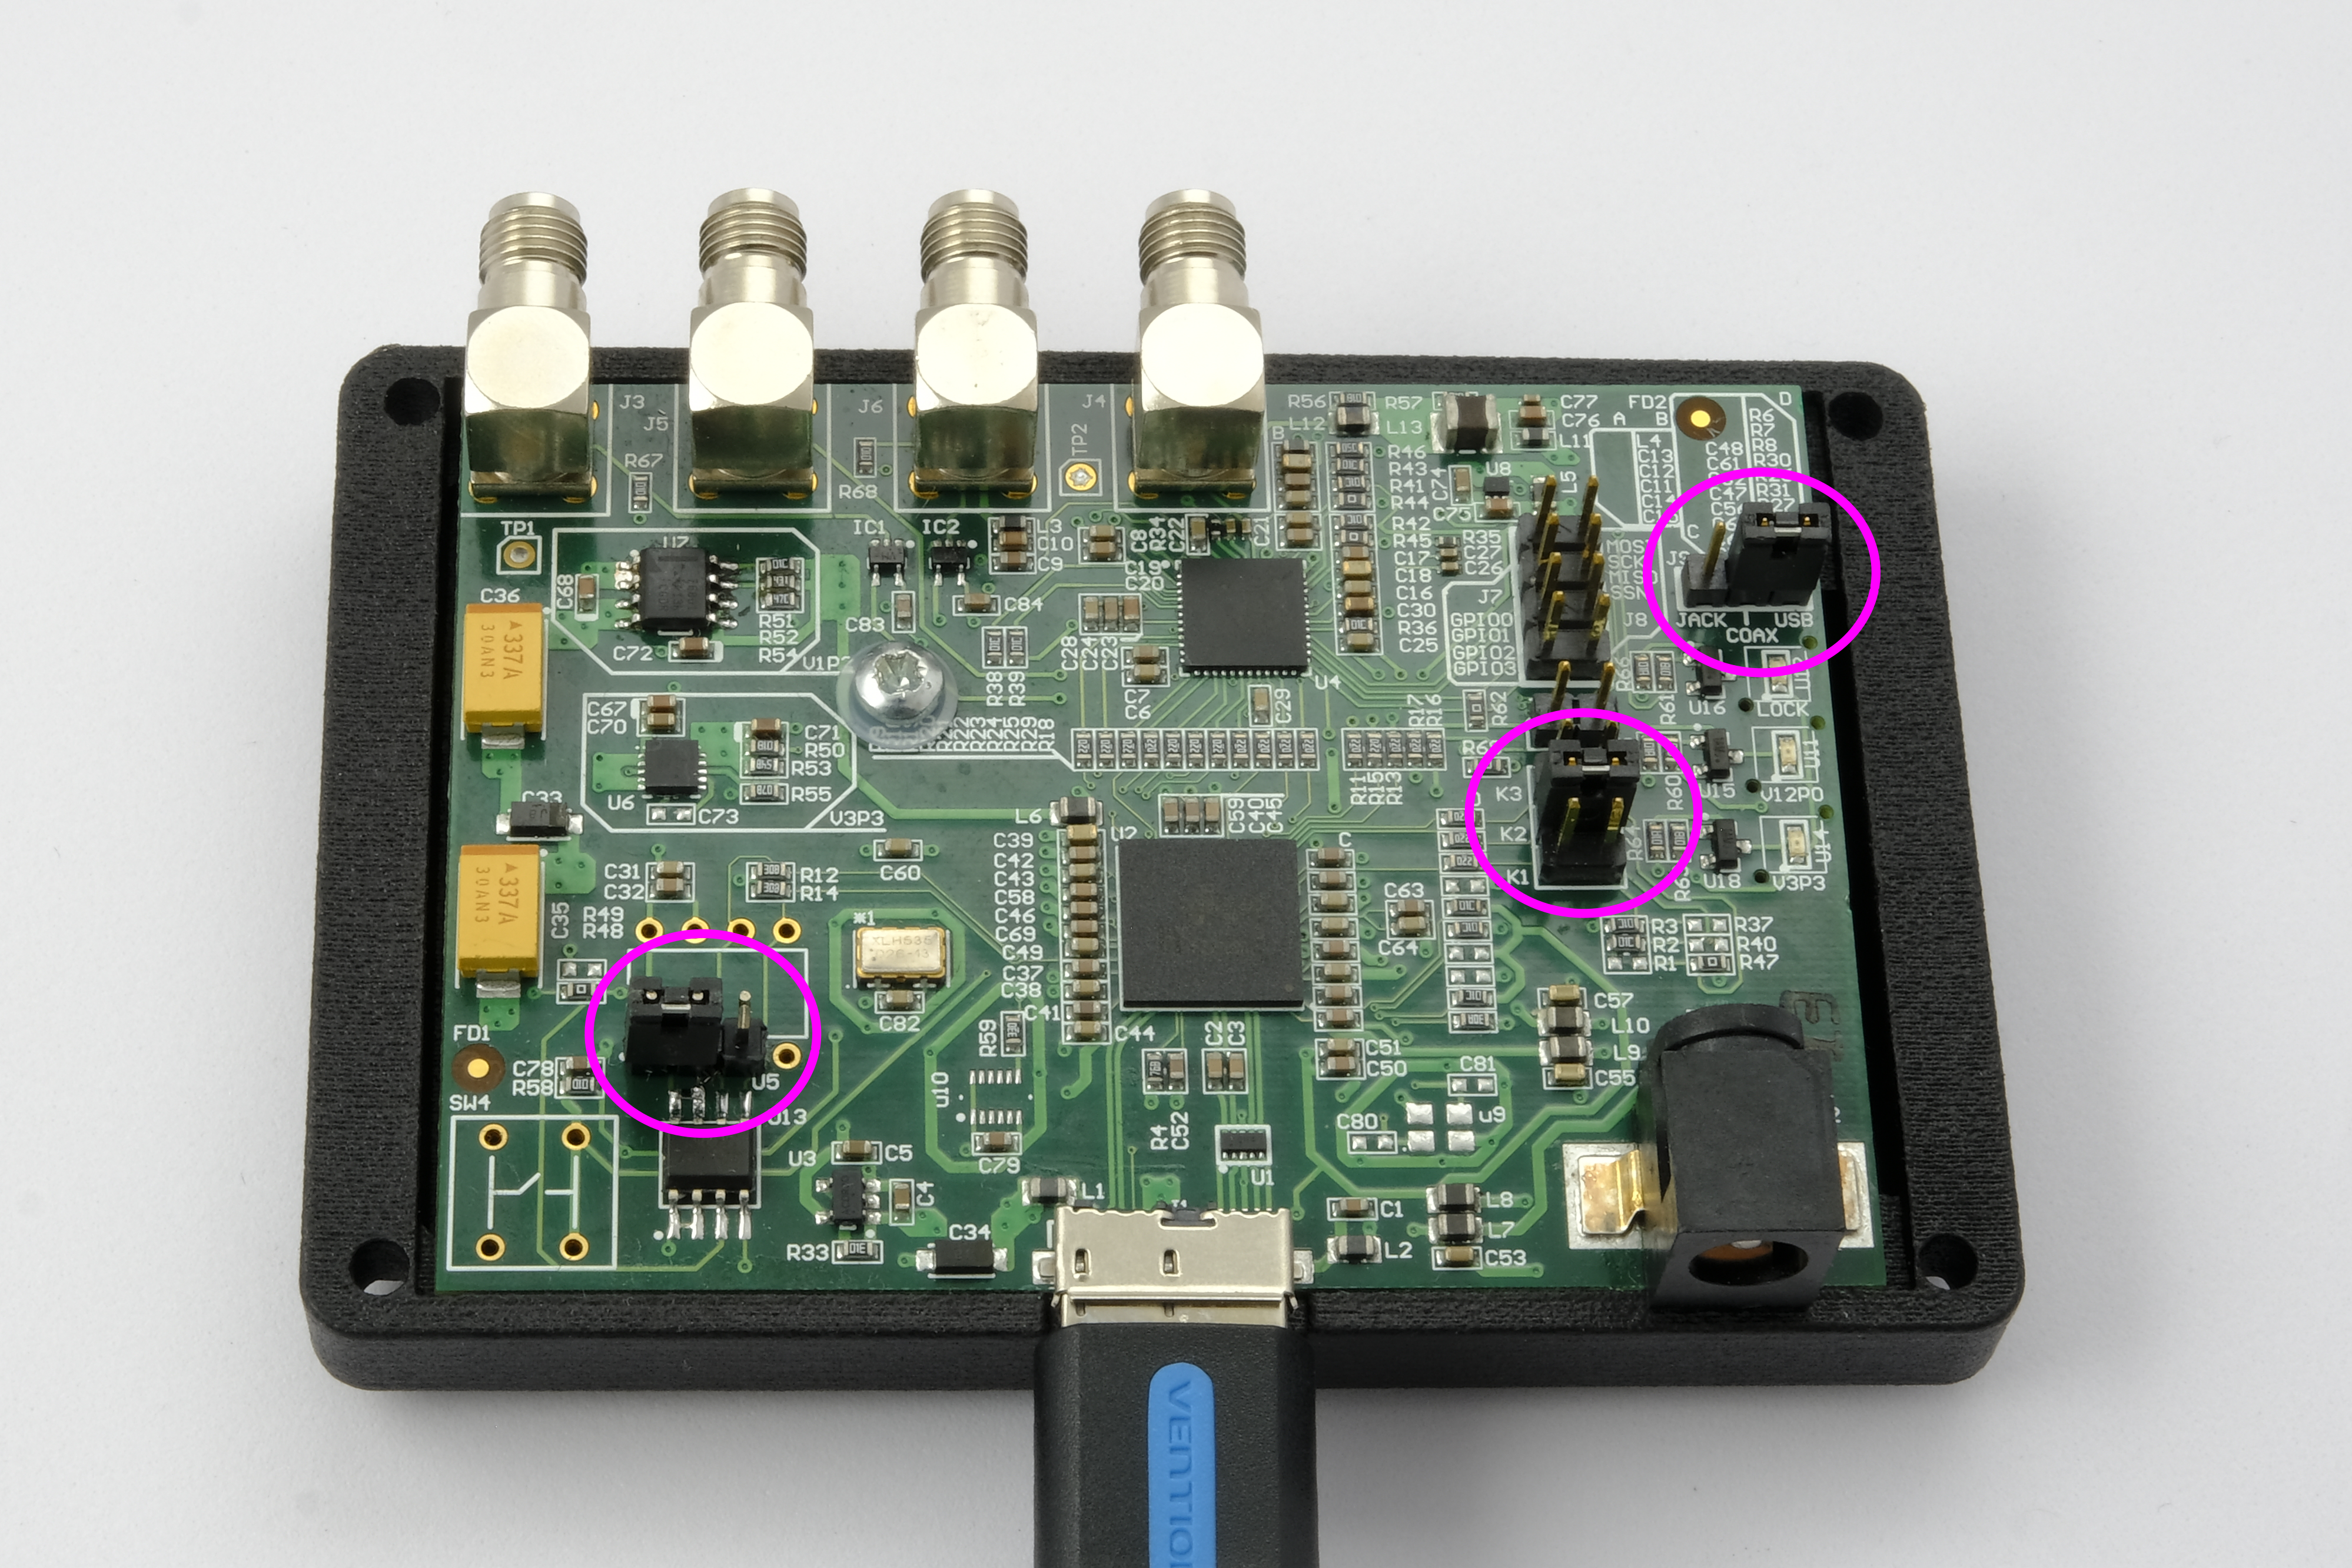
Replace the four fasteners to close the enclosure.
Reconnect the DAQ to the PC. It should appear in Device Manager as
UCLA/Open Ephys Miniscope DAQ v3underCameras.
The DAQ is ready for use.