Setup Guide for Windows#
Insert the PCIe Host Module#
Power off the computer.
Plug the PCIe host board into an available PCIe slot
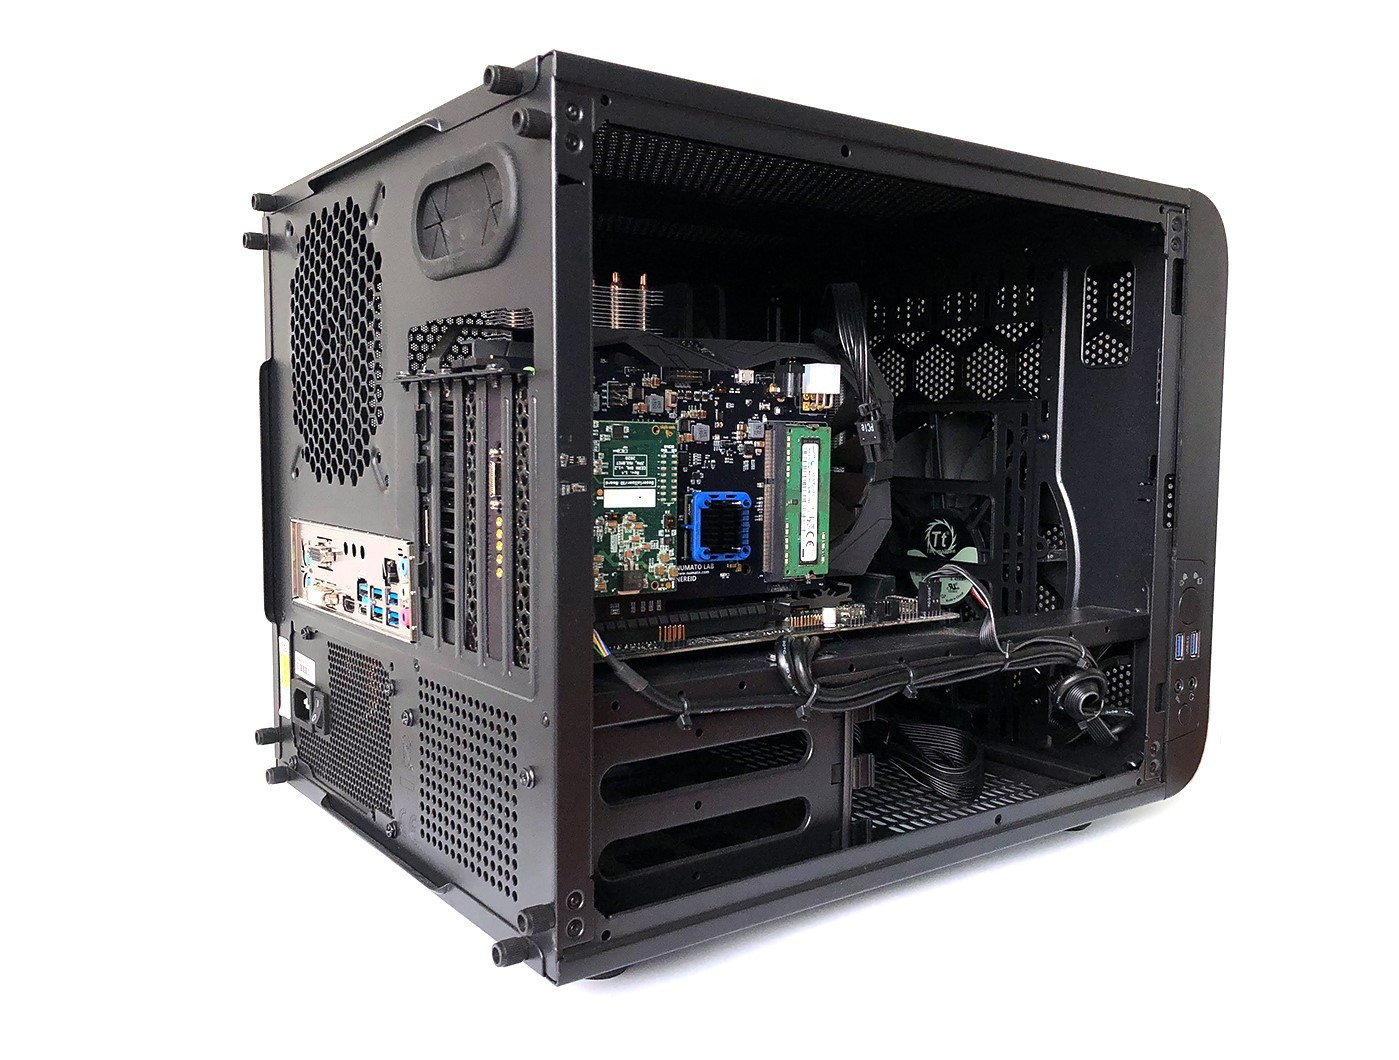
Important
Although the board will power on without it, you must plug a single PCIe power output from the computer’s ATX power supply into the board to ensure stable operation.
Boot the computer.
The RGB LED in the center of the module should be blue.
Note
The RGB LED has three color states.
Blue: Ready to go.
Yellow: Acquisition stopped.
Pink: Acquisition running.
Disable Secure Boot#
Navigate to your BIOS
Turn off Secure Boot (Under ‘Boot’ change OS type to ‘Other OS’)
Put Windows In Testing Mode#
Note
As of this writing, the ONIX driver is not digitally signed by Microsoft, but in a developer testing phase. Following the conclusion of the beta-test period, we will complete this process and the following steps will not be required.
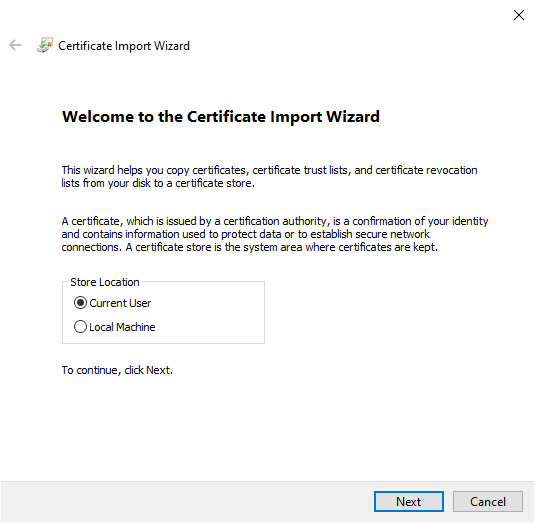
Download the
OpenEphysTestDriver.certesting certificate and double click it.On the resulting dialog, select Install Certificate.
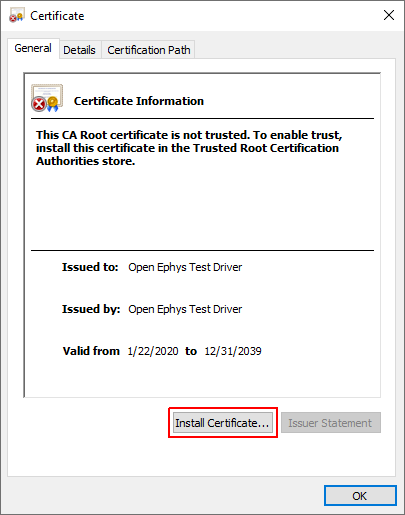
It is recommended to select Current User certificate storage option.
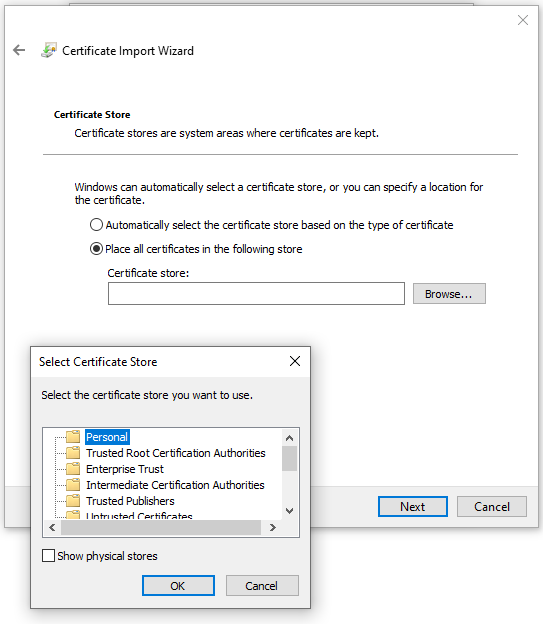
For ease of management, it is recommended to manually select a certificate storage and chose Personal.
Open the Windows Start Menu and type cmd to find the command prompt application. Right click it and chose Run as Administrator.
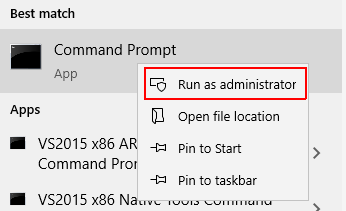
Execute the following command:
bcdedit /set testsigning on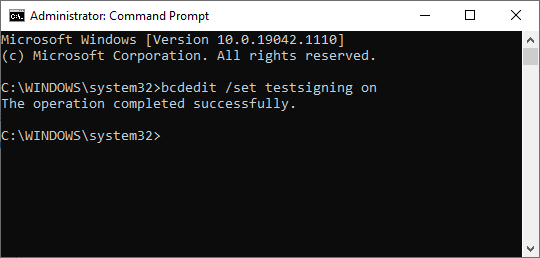
Restart the computer.
Note
A regular reboot (‘restart’) is required. A complete power cycle (turning the PC off completely) may not set the option.
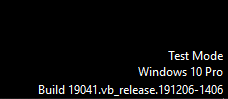
You should see now some text at the bottom right of the Desktop indicating that Windows is operating in testing mode:
Note
The computer will keep the test state until you run
bcdedit /set
testsigning off
in an administrator command prompt again and reboot the computer
Install C++ Runtime#
Windows does not ship with a C++ runtime. Before using ONIX on windows, you will need to install Microsoft Visual C++ Redistributable for Visual Studio 2015, 2017 and 2019.
Install RIFFA PCIe Driver#
Warning
Pre-built drivers target 64-bit Windows 10. Other targets will need to be compiled from source.
Download the latest RIFFA PCIe driver and unzip the archive.
In the extracted folder, right click the riffa.inf file. Select install from the context menu.
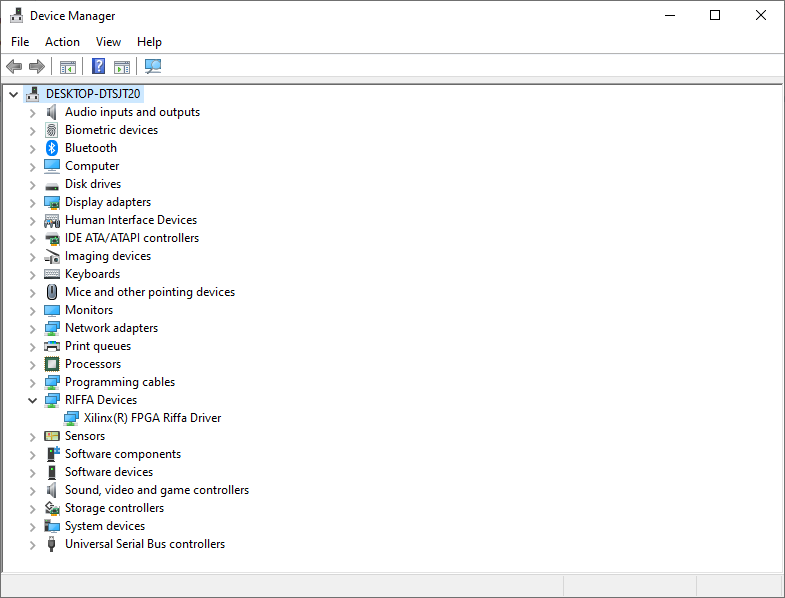
Open the start menu and type device manager and click to open. You should see RIFFA in the device tree.
Install Software#
Have a look at the Software Guide page for software options.