Updating PCIe Controller Gateware in Windows#
Important
ONIX PCIe controllers acquired from the Open Ephys Store are flashed with the latest version of the gateware. Gateware updates do not occur often, so you will typically not need to update it. Verify the gateware version as explained below and only proceed with the update if necessary.
If your PC has not yet been set up for use with the ONIX PCIe controller, follow the steps on the Setup Guide for Windows page.
Download the latest oni-repl Console Application and unzip it. Navigate to this location using a console (e.g. PowerShell).
Note
For a complete description of this program, have a look at its usage guide
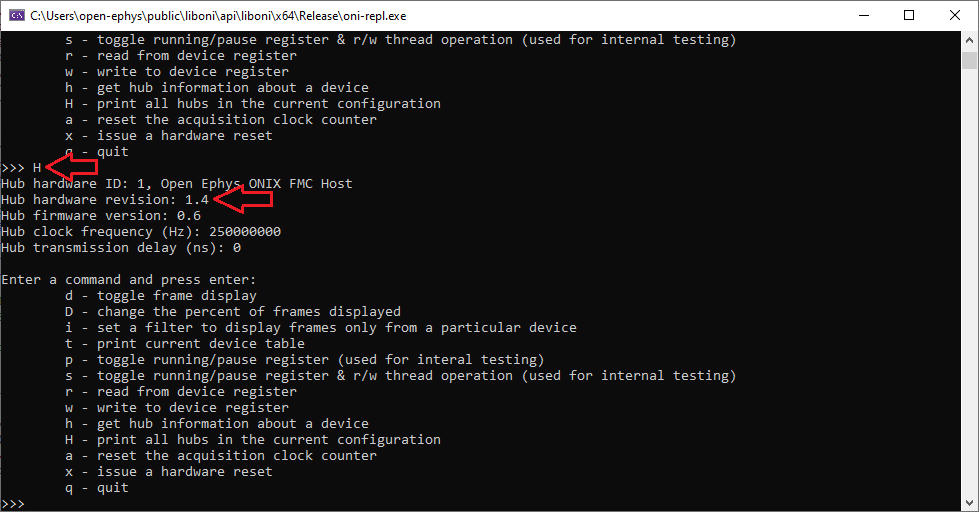
Verify your PCIe Controller Hardware version by running
oni-repland typing “H” into the command prompt. This will print a list of all hubs in the current ONI context, one of which will be the PCIe Controller. The hardware revision and version of the gateware currently on the system will be listed.$ oni-repl.exe riffa 0 ... ... ... >>> H
Check the PCIe Controller gateware image download page. If a more recent version of the gateware than that listed by the oni-repl application exists, download the lastest gateware that corresponds to your hardware revision. If the latest gateware listed is already the same version as the current one on your hardware, you do not need to update it.
Warning
Make sure that the controller gateware image you download matches the PCIe Controller Hardware revision you verified in the previous step. An incorrect gateware version will not report any error while updating but will cause failures during operation.
Download the PCIe Controller Upload Tool utilities package and unzip it. Navigate to this folder using a console.
Run the
oni_pcie_mode_changecommand to put the PCIe Controller into bootloader mode.$ oni_pcie_mode_change.exe
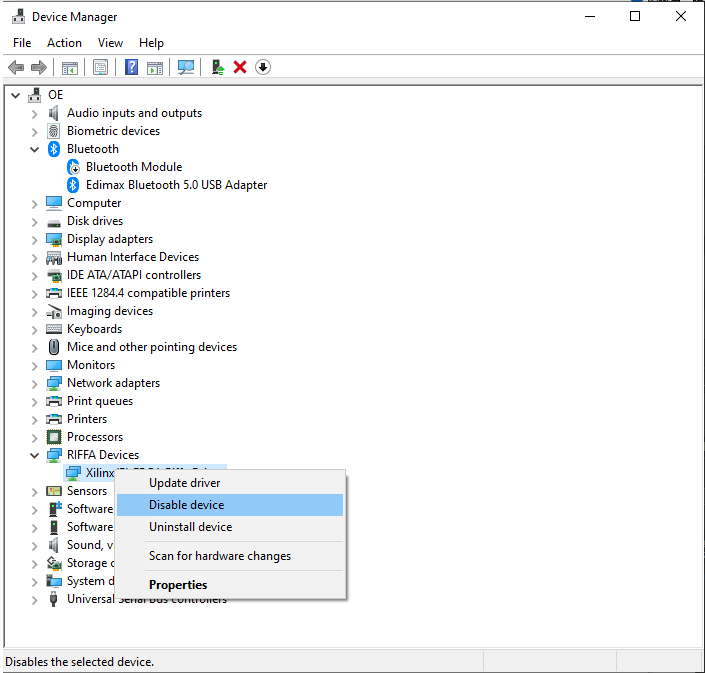
Open the Windows Device Manager by typing “device manager” into the windows search bar. Find the RIFFA device you are going to update in the device tree. It is listed under “Open Ephys ONI PCIe Devices”. Right click on the RIFFA device and select Disable device. Click Yes on the warning message.
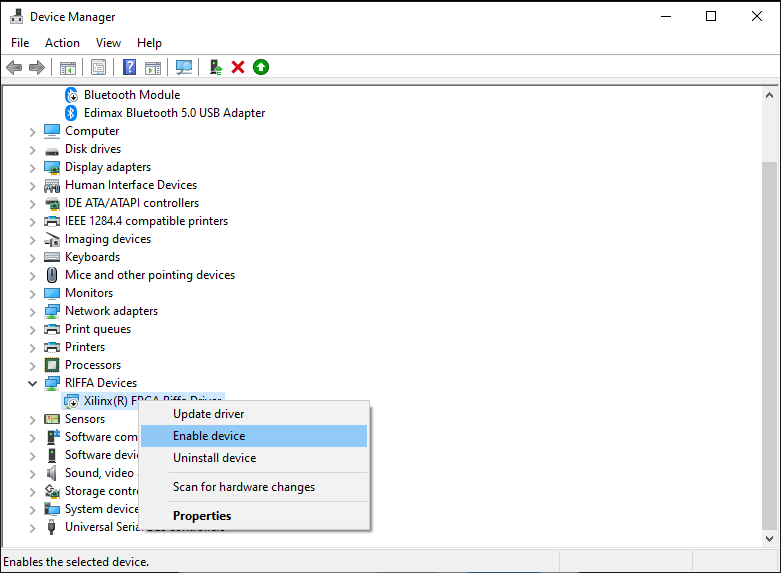
Right click again and click Enable device.
Note
If prompted to do so, or if the device has a small yellow triangle icon next to it, you will need to reboot your computer to finish the process.
Return to the console and run the
oni_pcie_flash_imagecommand using the .bin file downloaded in step 4 and the index of the PCIe Controller device you want to update. If you only have a single PCIe Controller, index can be specified as 0 or omitted.$ oni_pcie_flash_image.exe <path to image.bin> [index]

When the program completes, run
oni_pcie_mode_changeto put the PCIe Controller into normal mode.$ oni_pcie_mode_change.exe
Repeat steps 7 and 8 to reenable the PCIe Controller with the updated gateware.
To verify the gateware update, repeat step 3. The gateware version of the PCIe Controller should now match the one downloaded in step 4.