Commutator Control#
Plugin Type |
Sink |
Platforms |
Windows, Linux, macOS |
Built in? |
No |
Key Developers |
Brandon Parks, Aarón Cuevas López |
Source Code |
Tip
For instructions and an example signal chain for using this plugin, visit the Automating Tether Commutation tutorial.
For additional documentation on the commutator hardware, please refer to the Open Ephys Commutators docs site.
Installing and upgrading#
The Commutator Control plugin is not included by default in the Open Ephys GUI. To install, use ctrl-P or ⌘P to open the Plugin Installer, browse to “Commutator Control”, and click the “Install” button. After installation, Commutator Control will appear in the processor list on the left side of the GUI’s main window.
The Plugin Installer also allows you to upgrade to the latest version of this plugin, if it’s already installed. The plugin must be removed from the signal chain prior to upgrading.
Plugin configuration#
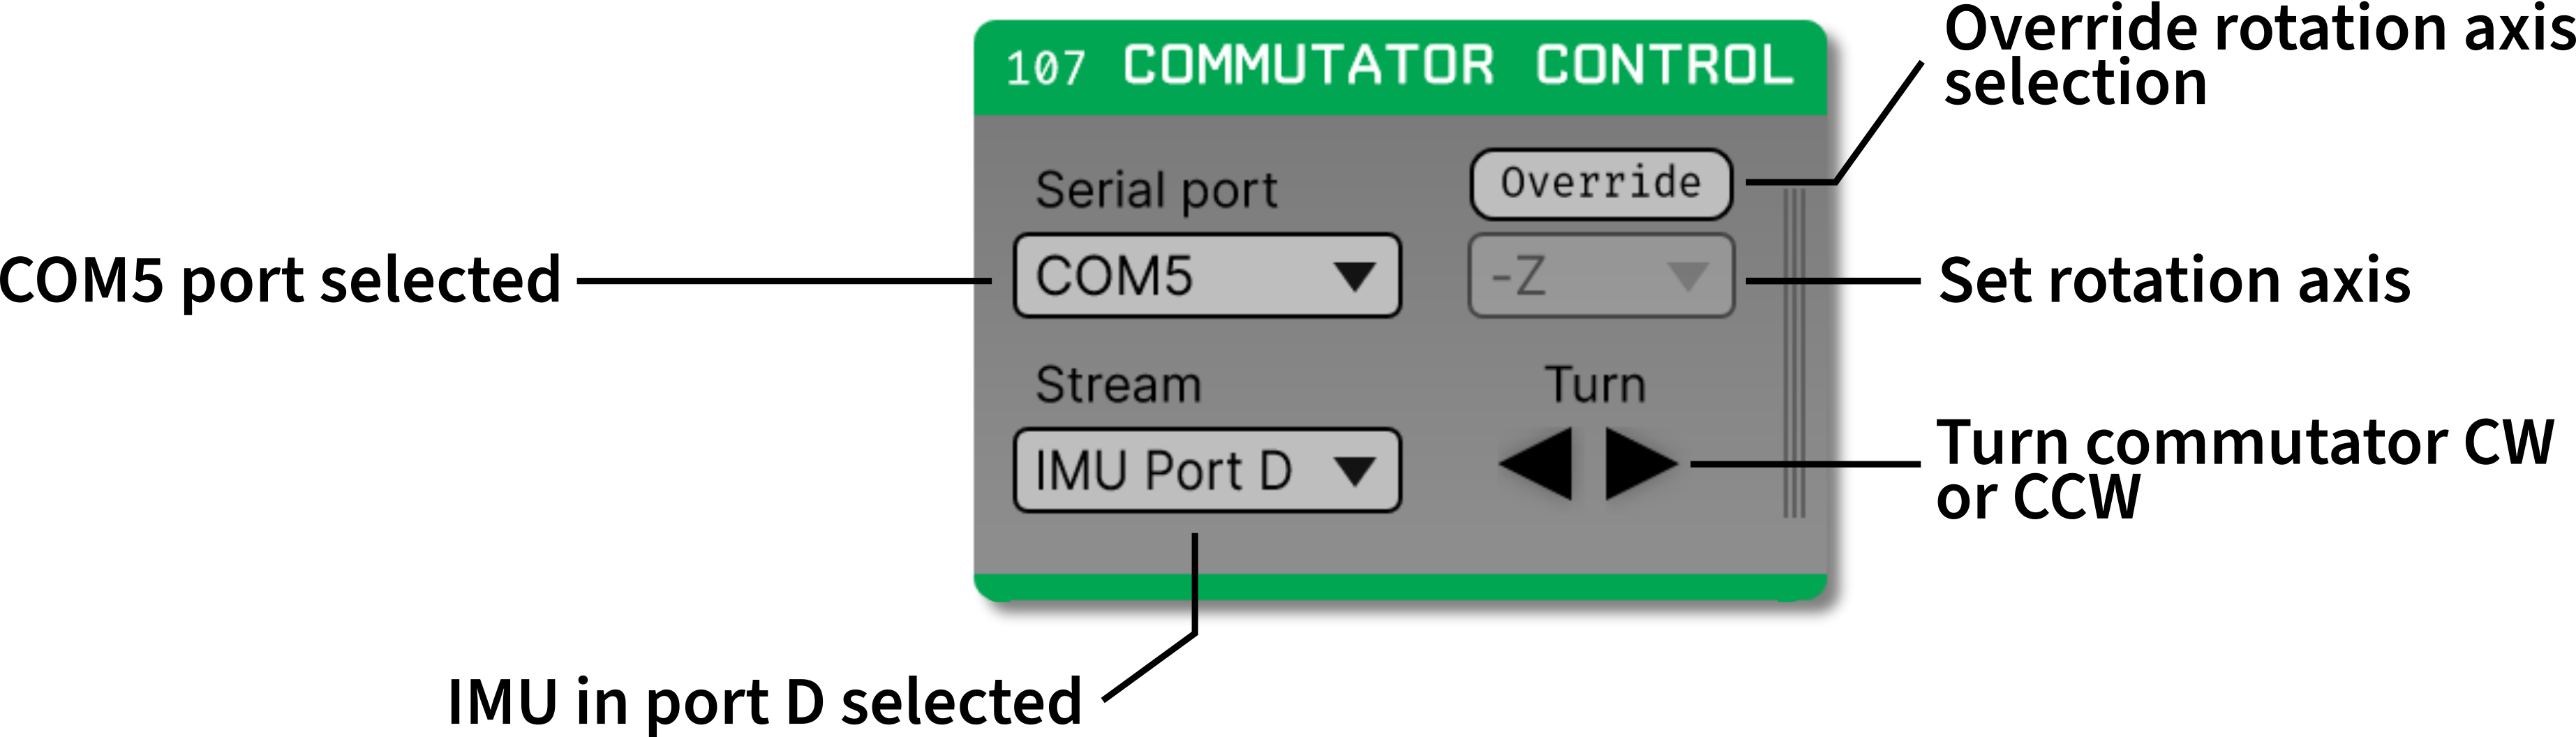
Serial port selector#
In the top-left corner of the commutator processor, there is a dropdown menu to select the COM port that corresponds to your commutator. To determine which COM port corresponds to your commutator:
Unplug your commutator.
Add the commutator processor into the signal chain.
Click the dropdown. Note the COM ports that are shown in the dropdown.
Plug in your commutator.
Remove the commutator processor from the signal chain and add it back in.
Click the dropdown. The COM port that appears in this step but not in step 3 is the one that corresponds to your commutator.
Stream selector#
In the bottom-left corner of the commutator processor, there is a dropdown menu to select which IMU stream you would like to use to calculate commutator rotations. The options provided by the dropdown correspond to IMUs detected in the Acquisition Board processor.
Rotation axis selector#
In the top-right corner of the commutator processor, there is a dropdown menu to select the relevant rotation axis for calculating commutator rotations.
The GUI software automatically pre-maps each headstage’s orientation axes such that the +Z axis aligns along the tether where it connects to the headstage, so you shouldn’t need to change this value. However, if you do need to change this value, there is an “override” button to allow you to do that. For more information on the headstages’ axes, look at the Headstages section of the Acquisition Board docs.