Python Processor#
Plugin Type |
Filter |
Platforms |
Windows, Linux, macOS |
Built in? |
No |
Key Developers |
Spencer Blackwood, Anjal Doshi |
Source Code |
Installing and upgrading#
The Python Processor plugin is not included by default in the Open Ephys GUI. To install, use ctrl-P or ⌘P to open the Plugin Installer, browse to the “Python Processor” plugin, and click the “Install” button.
The Plugin Installer also allows you to upgrade to the latest version of this plugin, if it’s already installed.
Setting up a Python environment#
This plugin must be able to find a local installation of Python version 3.10 with numpy installed correctly.
To avoid conflicts with other Python installations, we recommend using Conda to manage your Python environments. You can install Conda either using Miniconda or Anaconda by following the instructions here. More information on how to use Conda can be found here.
To create a new Conda environment that uses Python 3.10, enter the following conda command in your Anaconda prompt (Windows) or Terminal (Linux and macOS):
conda create -n oe-python-plugin python=3.10
This will create a new Conda environment with Python 3.10 installed. Then, activate this newly created environment like so:
conda activate oe-python-plugin
After this, numpy needs to be installed in the same environment as follows:
conda install numpy
Setting the Python Interpreter Path#
After creating a dedicated Python 3.10 Conda environment, you can add the plugin to any signal chain. When inserted, the plugin prompts you to select the Python Home directory—the location of the Python interpreter. Providing this path lets the plugin use libraries from a specific environment at runtime, without relying on the system PATH.
With Conda, this is typically the path to the environment’s Python interpreter inside Conda’s installation directory. For example, if you created an environment named oe-python-plugin, the path would be:
Windows:
C:\Users\<username>\miniconda3\envs\oe-python-pluginmacOS -
~/miniconda3/envs/oe-python-pluginLinux -
~/miniconda3/envs/oe-python-plugin
If you installed Anaconda instead of Miniconda, the folder may be named Anaconda or Anaconda3.
After you select the path, the plugin should load into the signal chain. If it cannot load the interpreter, it will prompt for the Python Home path again—this usually indicates an incorrect path or an incompatible Python version (not 3.10). If the problem persists, close and relaunch the GUI to reset the PATH variables.
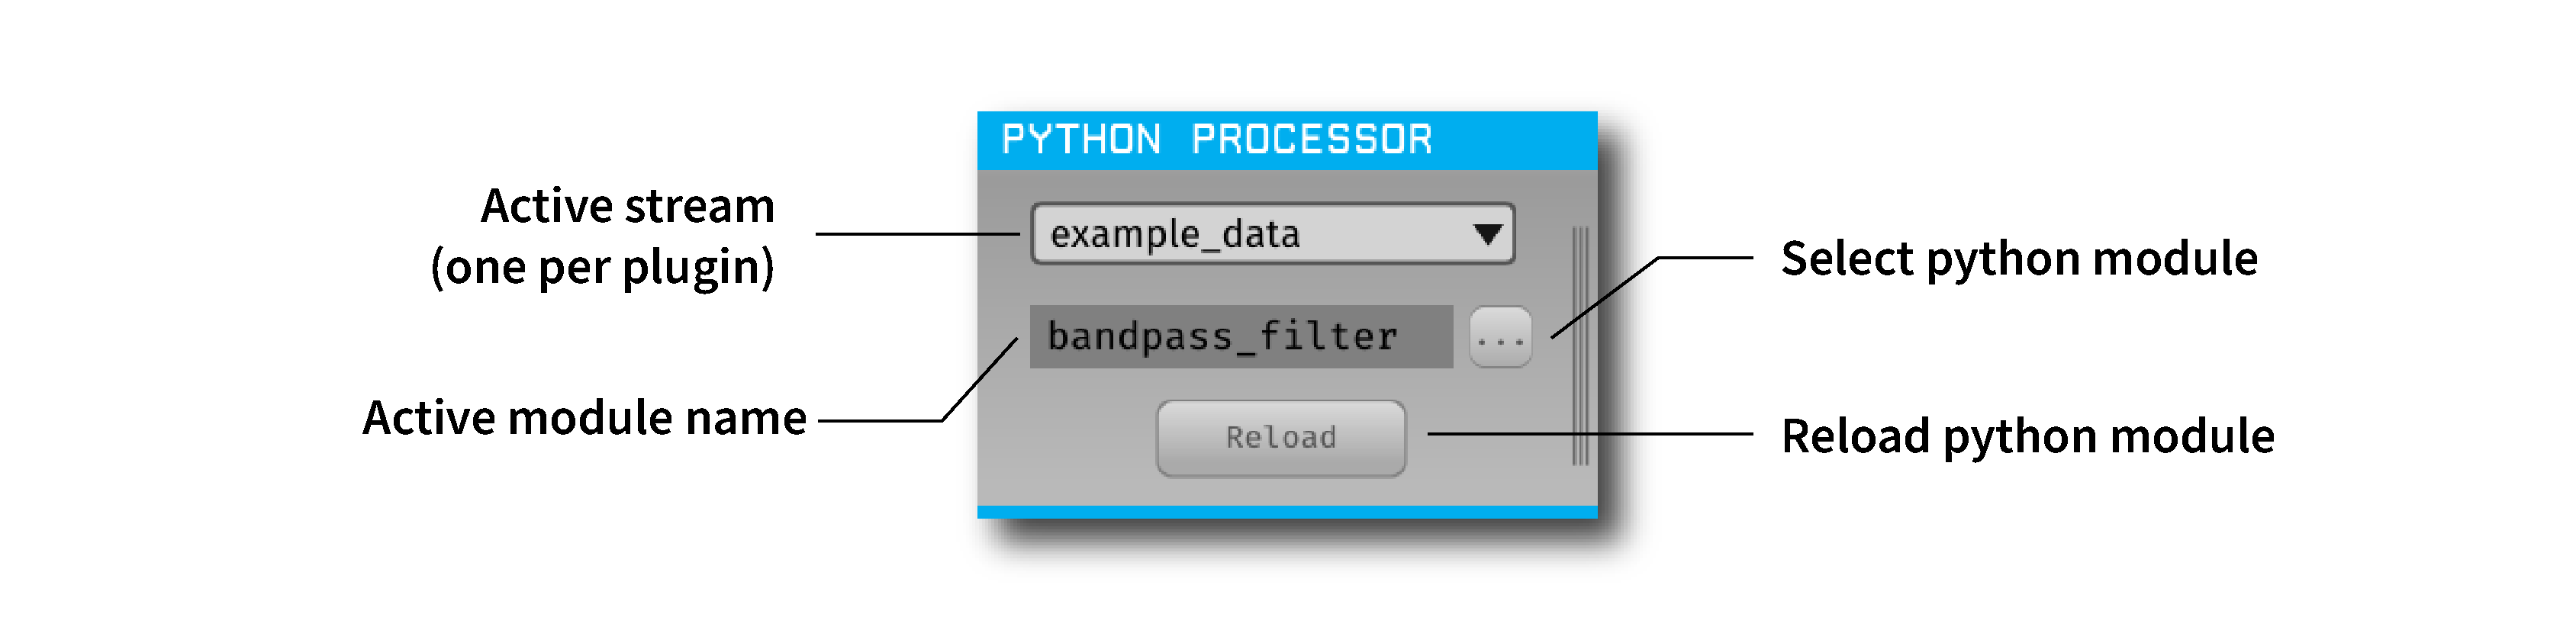
Creating & loading a Python Module#
After the plugin is added to the signal chain, you must load a Python module (script) into the GUI. This script should follow the structure of the processor template available in the plugin’s GitHub repository. The PyProcessor class provides the following functions to the Python module, enabling interaction with incoming data:
- __init__(processor, num_channels, sample_rate)#
A new processor is initialized when the module is imported/reloaded, or the plugin’s settings are updated (i.e., the number of input channels changes, or a new stream is selected).
- Parameters:
processor (object) – Python Processor class object used for adding events from python.
num_channels (int) – number of input channels from the selected stream
sample_rate (float) – the selected stream’s sample rate
- process(data)#
Process each incoming data buffer. Any modifications to the
datavariable will be passed to downstream processors.- Parameters:
data (ndarrary) – N x M numpy array, where N = num_channles, M = num of samples in the buffer.
- start_acquisition()#
Called before starting acquisition. Allows the script to do some setup/initialization before acquisition starts.
- stop_acquisition()#
Called after stopping acquisition. Allows the script to do some finalization after acquisition stops.
- start_recording(recording_dir)#
Called before starting recording. Informs the plugin that the GUI is now recording data, in case it needs to save any information of its own.
- Parameters:
recording_dir (str) – directory where recording related files are supposed to be stored
- stop_recording()#
Called before stopping recording. Informs the plugin that the GUI is no longer recording data.
- handle_ttl_event(source_node, channel, sample_number, line, state)#
Handle each incoming ttl event.
- Parameters:
source_node (int) – id of the processor this event was generated from
channel (str) – name of the event channel
sample_number (int) – sample number of the event
line (int) – the line on which event was generated (0-255)
state (bool) – event state True (ON) or False (OFF)
- handle_spike(source_node, electrode_name, num_channels, num_samples, sample_number, sorted_id, spike_data)#
Handle each incoming spike.
- Parameters:
source_node (int) – id of the processor this spike was generated from
electrode_name (str) – name of the electrode
num_channels (int) – number of channels associated with the electrode type
num_samples (int) – total number of samples in the spike waveform
sample_number (int) – sample number of the spike
sorted_id (int) – the sorted ID for this spike
spike_data (ndarrary) – waveform as N x M numpy array, where N = num_channels & M = num_samples (read-only).
Using this template, any type of data processing can be done in Python in real-time. The data buffer should be overwritten with the new processed data, which will be received by downstream processors.
Note
Pay careful attention to the latency introduced by processing data in Python, especially with high-channel-count data.
You can also send TTL events from Python back to C++. These events are added to the event buffer and can be processed by downstream plugins. This is accomplished using a C++ function exposed to Python through the embedded oe_pyprocessor module.
- add_python_event(line, state)#
Sends a TTL event from Python to C++.
- Parameters:
line (int) – event line number [0-255]
state (bool) – event state True (ON) or False (OFF)
To use this function, import the oe_pyprocessor module in your script. Then, call the C++ function using the processor object provided in the __init__() method, for example: self.processor.add_python_event(line, state)
An example script is provided in the plugin’s GitHub repository in the form of a Butterworth Bandpass filter. This filter is the same as the one used in the GUI’s built-in Bandpass Filter plugin.
Limitations#
Unlike continuous data and events, sending spikes back from Python is not currently possible.
With increasing channel counts, the processing latency may also increase, potentially affecting real-time performance.
Only one instance of the plugin is allowed at a time in a signal chain. Having multiple instances of the plugin in the same signal chain will result in random crashes.
Creating visualizations in real-time using Python libraries such as
matplotlibis not possible.