ZMQ Interface#
Plugin Type |
Sink |
Platforms |
Windows, Linux, macOS |
Built in? |
No |
Key Developers |
Francesco Battaglia, András Széll, Anjal Doshi |
Source Code |
Tip
The client application may be written in any language/platform supporting ZeroMQ.
Installing and upgrading#
The ZMQ Interface plugin is not included by default in the Open Ephys GUI. To install, use ctrl-P or ⌘P to access the Plugin Installer, browse to the “ZMQ Interface” plugin, and click the “Install” button.
The Plugin Installer also allows you to upgrade to the latest version of this plugin, if it’s already installed.
Plugin Configuration#
The plugin editor contains three editable parameters:
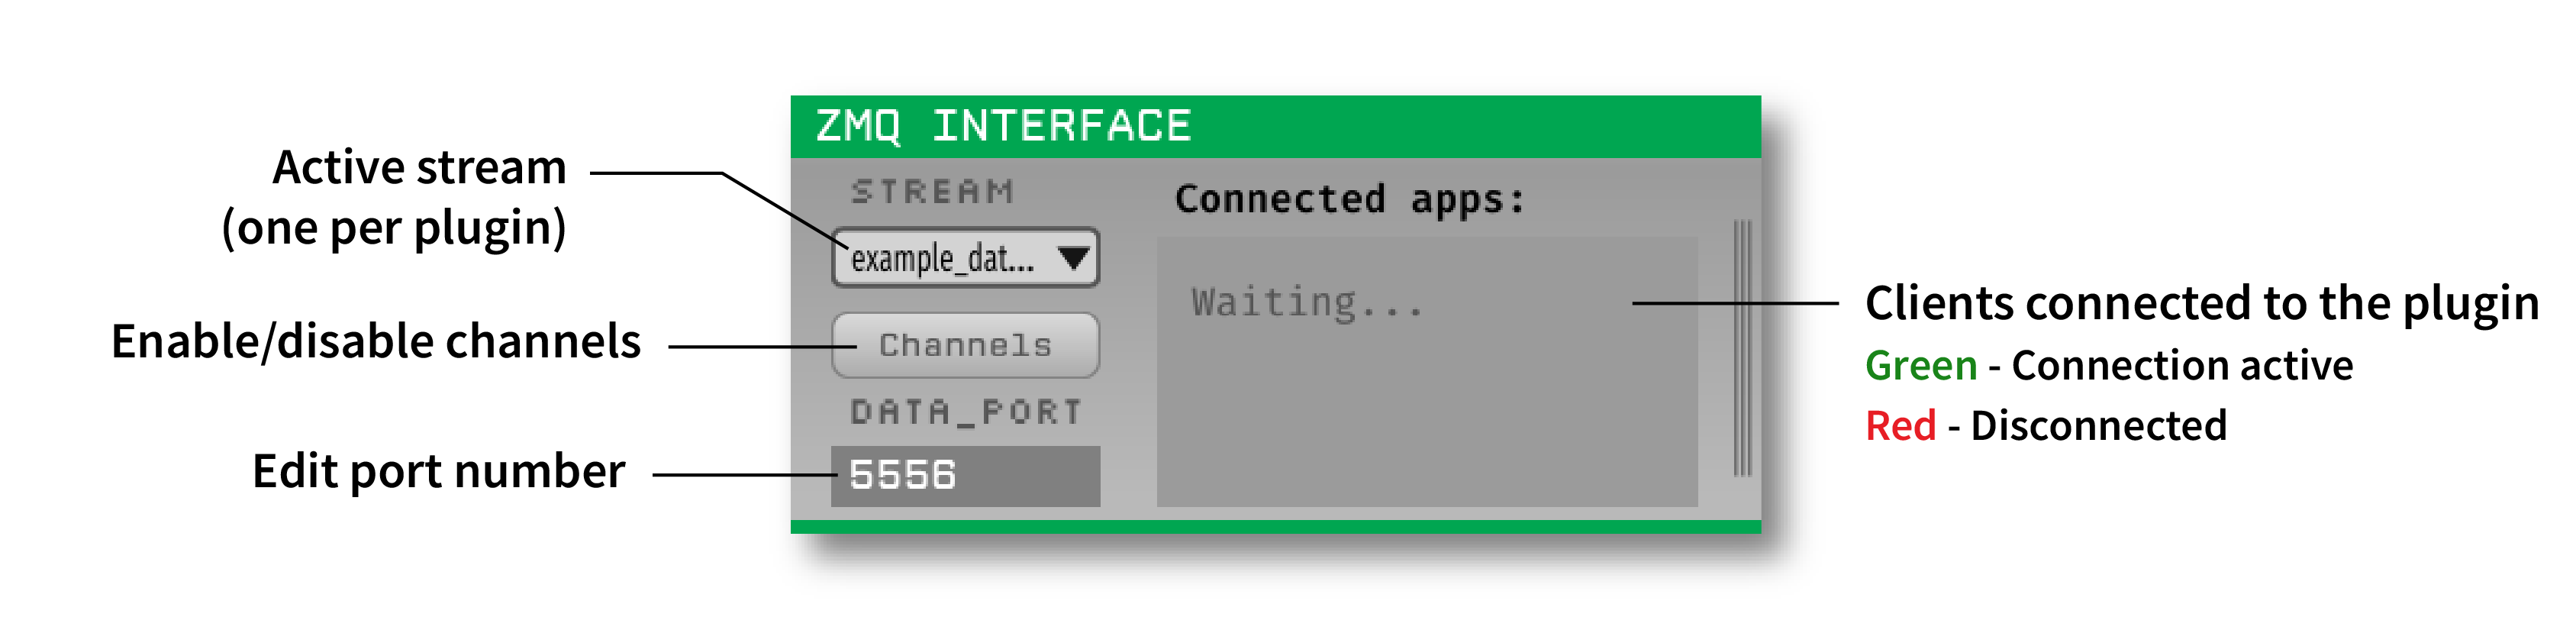
Stream: Select an incoming data stream to use. Each ZMQ Interface plugin can only send one stream at a time. To send data from multiple streams, place several plugins in series.
Channels: The continuous data channels to send (all are selected by default).
Data Port: Port number for the ZMQ socket.
The editor also shows a list of clients connected to the plugin via the listening port (data port + 1). For example, if the data port is 5556, the listening port will be 5557. If a client is successfully connected (a heartbeat message is received), then its name will show up in green in the list once acquisition has started. If the client fails to send a heartbeat message within 5 seconds, its name will turn red.
Using multiple plugins#
It is possible to use multiple ZMQ Interface plugins in the same signal chain, for example to send data after different processing steps, or to send data from different streams. It’s also possible to use one plugin to stream continuous data and one to stream events and/or spikes, in order to route each type of data to different clients.
To prevent conflicting port numbers, each additional ZMQ Interface added to the signal chain will automatically increase its data port number by two until an available port is found. Unique port numbers can also be assigned manually.
Heartbeat messages#
In order for a client to be detected, it must periodically send heartbeat messages to the plugin’s listening port. Each heartbeat message is a JSON string with the following fields:
"application" : application name
"uuid" : universally unique identifier (string)
"type": "heartbeat"
The recommended heartbeat interval is 2 seconds.
Data Packets#
The ZMQ Interface sends multi-part ZMQ messages. Each message consists of three parts:
Message Envelope#
Contains the type of message being received (data, spike, or event), as well as the index of the message (message_num).
Message Header#
A JSON string containing information about the incoming data packet:
Continuous data#
"stream" : stream name
"channel_num" : local channel index
"num_samples": num of samples in this buffer
"sample_num": index of first sample
"sample_rate": sampling rate of this channel
Event data#
"stream" : stream name
"source_node" : processor ID that generated the event
"type": specifies TTL vs. message,
"sample_num": index of the event
Spike data#
"stream" : stream name
"source_node" : processor ID that generated the spike
"electrode" : name of the spike channel
"sample_num" : index of the peak sample
"num_channels" : total number of channels in this spike
"num_samples" : total number of samples in this spike
"sorted_id" : sorted ID (default = 0)
"threshold" : threshold values across all channels
Message Data#
Continuous
Continuous data from one channel
TTL Event
Event data (in order) = {1Byte: ‘Event Line’, 1 Byte: ‘Event state(0 or 1)’, 8 Bytes:’TTL Word’}
Spike
Spike waveform
Example Code#
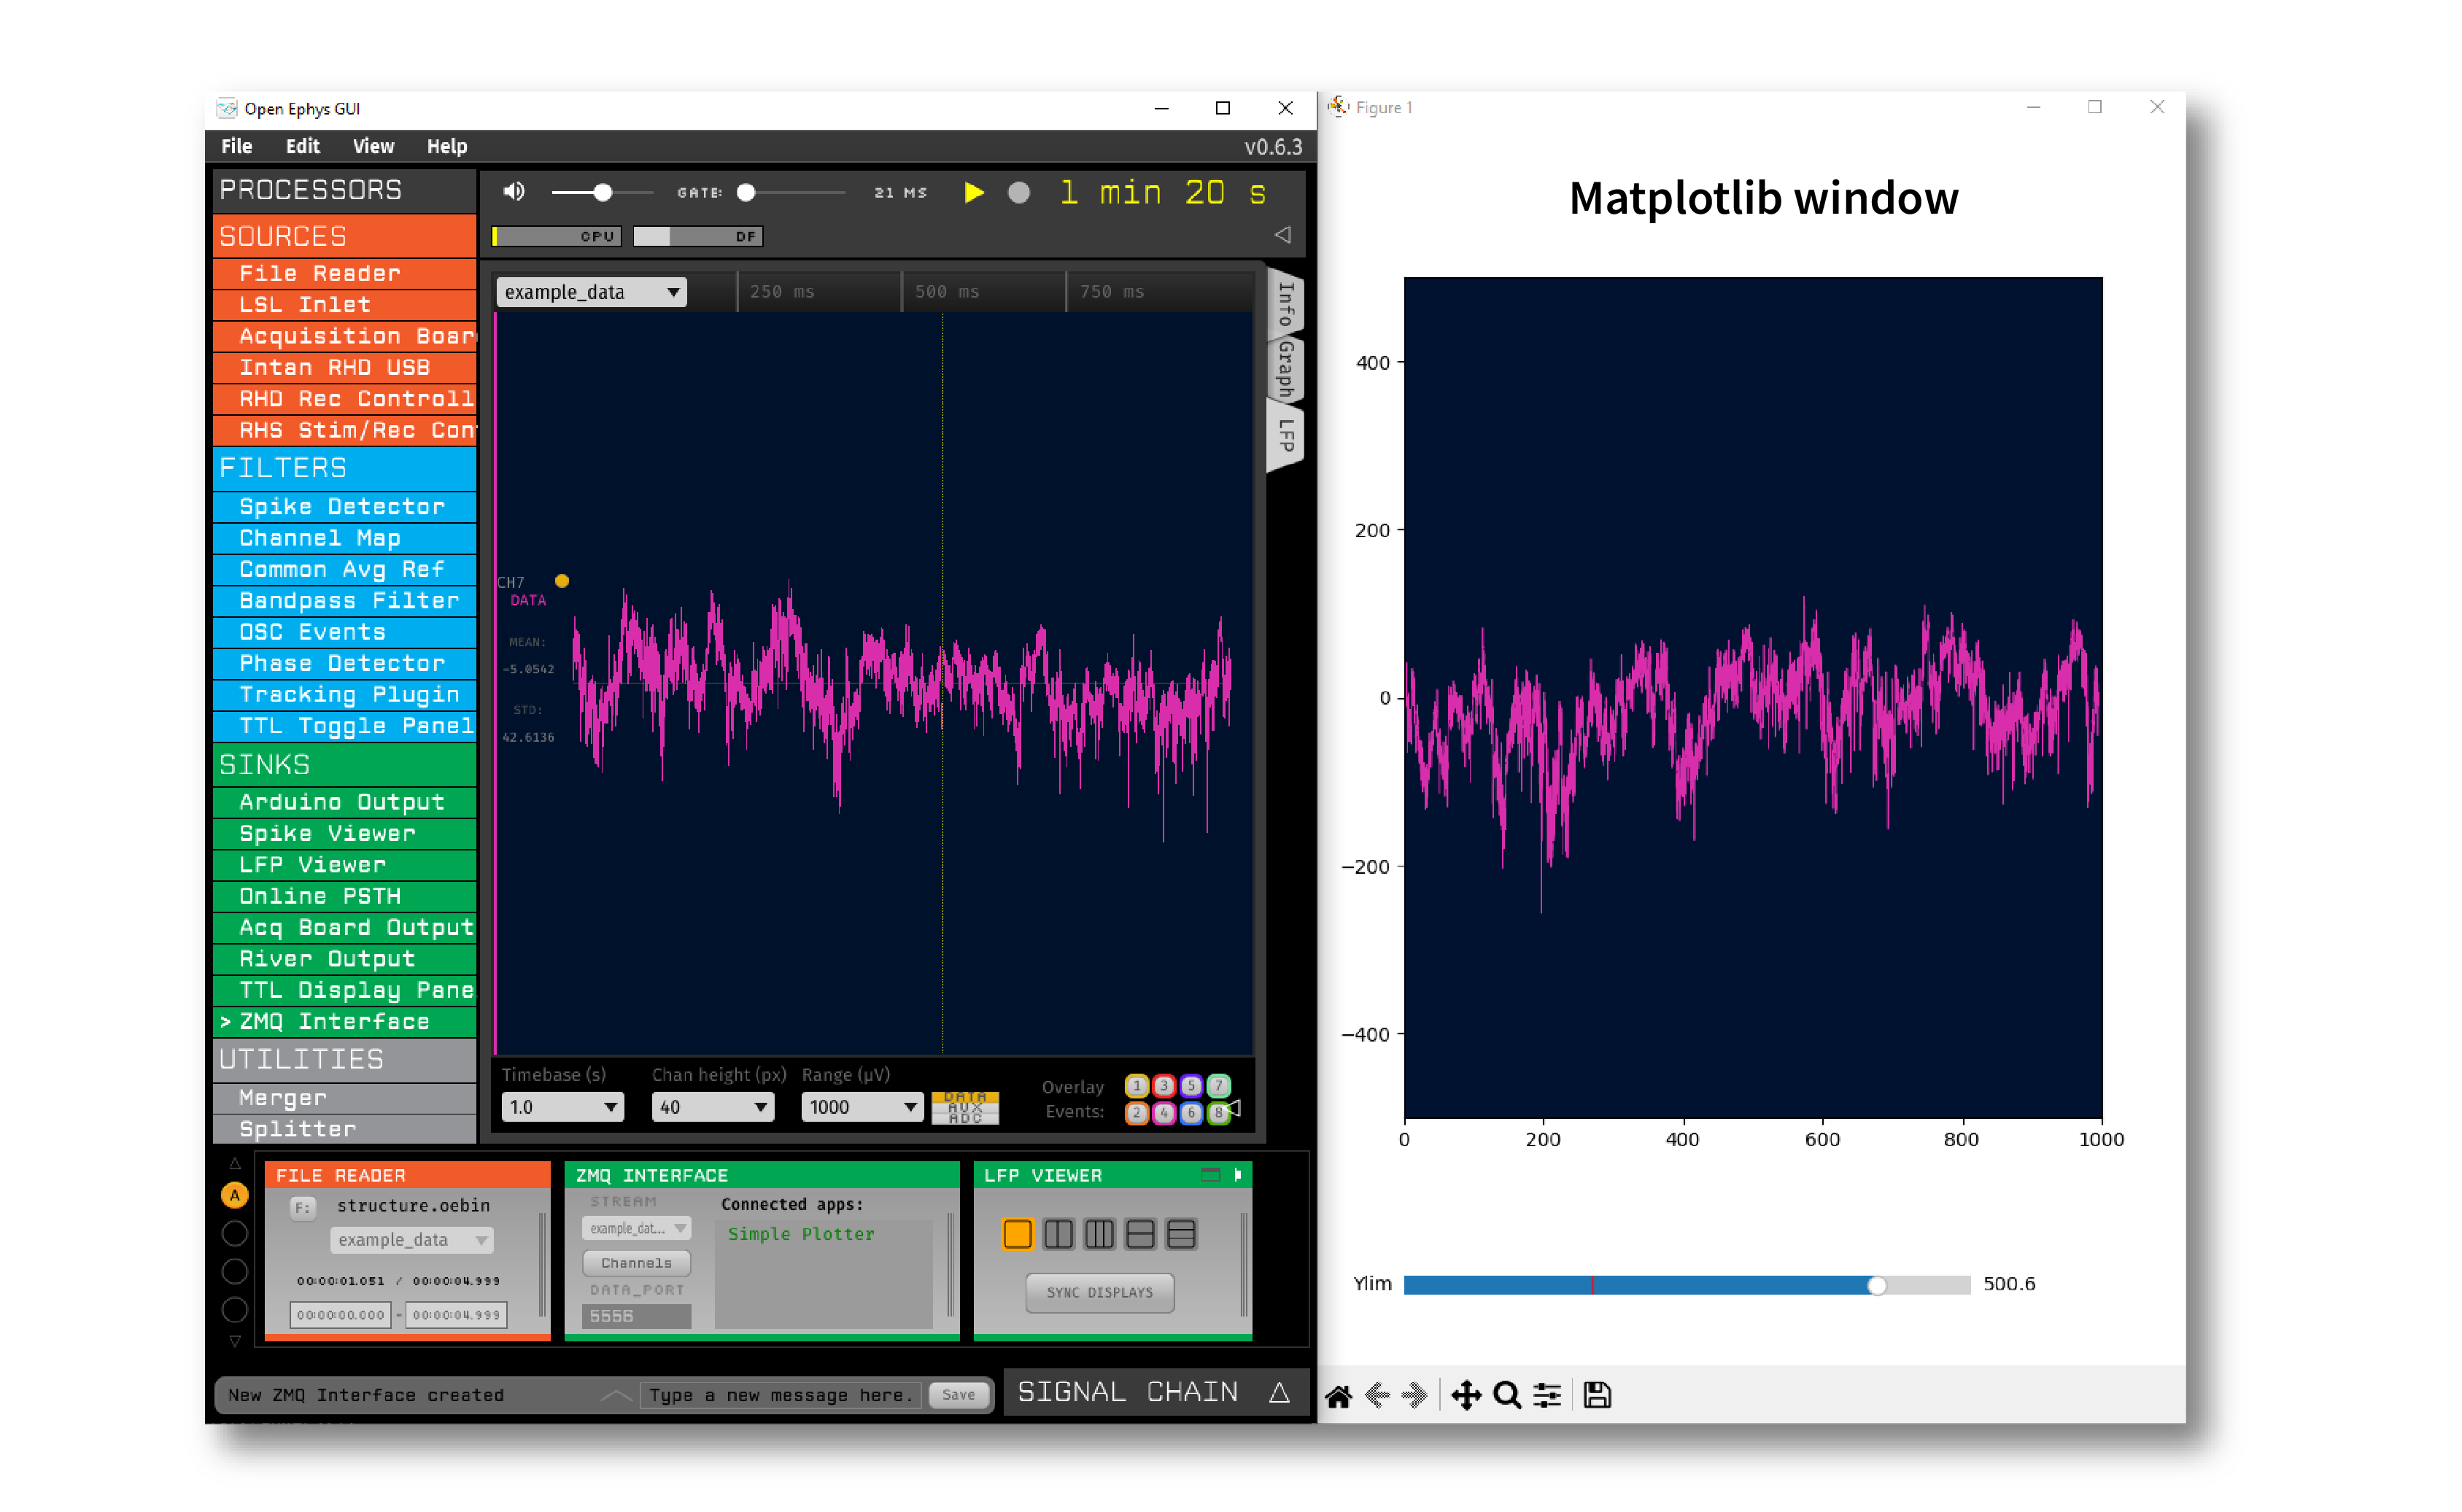
In the Resources/python_client directory of the plugin repository, there is an example Python client called simple_plotter_zmq.py which plots the continuous data received from the Open Ephys GUI over a network port (see image below).